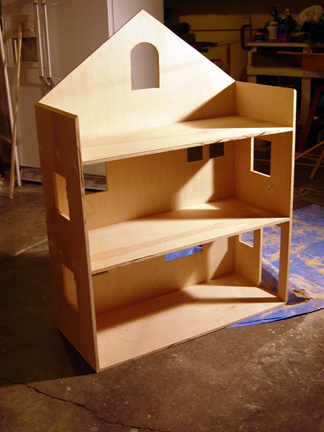
As you can see, we got all of the windows and the door cut out today! It’s finally starting to look less like shelves and more like a little house at this point. 🙂 As it were, it was quite easy to cut out the windows and doors after assembly, but before putting on the roof and base box. You could just turn the dollhouse to which side you wanted to work on and use the saber saw to cut out the window and door holes without need for setting up saw horses or anything. However I would recommend cutting out your door before assembly since the door comes flush to the floor and it can be tricky business to cut it out after being nailed and glued.
I’ve prepared a brief little tutorial on how we cut out the windows and doorway for anyone who is a beginner like me and needs some ideas. 🙂

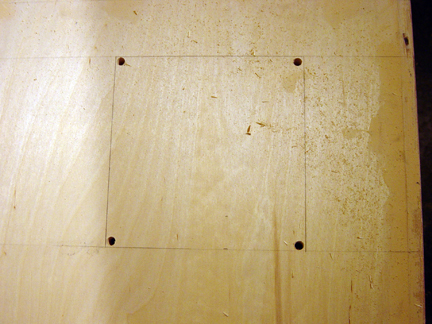
The first thing you need to do before cutting of course is to measure and draw out all of your window and door openings, which you can see is what I did in the pic above. We are using a saber saw to cut out our windows, but the saber saw needs a start point, so we drilled 4 holes the width of the saw blade, one in each corner of the window, but not flush with the lines. These drilled holes provided a starting point for the saber saw and after starting all we had to do was follow the lines.

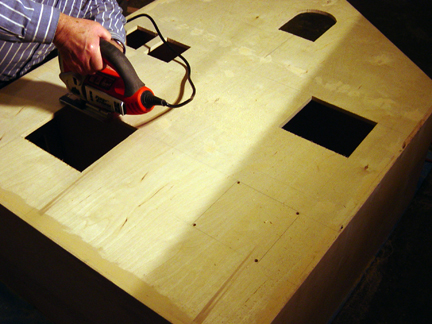
After the block of wood plops out of your opening, you can then take the saw and go back to touch up and square off your corners like my dad is doing in this picture. Now your windows won’t be totally perfect lines, but they will be good enough so that when you sand and add your trim and finishings they will be tidy little windows of awesome. I’ll have to go through my finishing methods later though as I have stopped working for the evening.
