
So I’m finally getting around to blogging about this, *sigh*, just too many things to do in a day. Anyway I’m splitting this posting into 3 separate posts since the whole rerooting and painting process is really long and it also might help compartmentalize things. I think a lot of my working process hasn’t changed much since the last time I did one of these, but hopefully you won’t find it too redundant and maybe even helpful, le gasp!
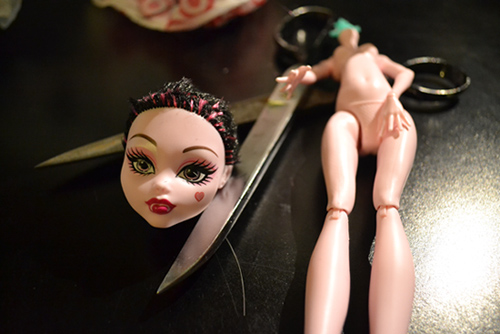
Ok, so I’m going to start off with the ripping everything apart phase, lol. First thing you need to do is pop off the head and trim all of the hair off as close to the scalp as you can with scissors.
The next phase is the most horrible phase of customizing, and that is pulling out all the god awful glue and hair from the inside of the dolls head.
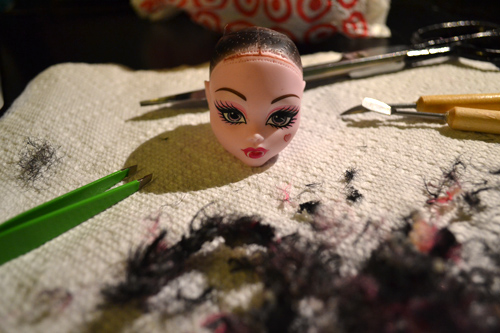
In the above picture I have just finished “de-gluing” the head. You can see all the nappy hair bits around and you can also see the tools I used. Good tweezers are a must of course, you’ll need them to pull out all the glue blobs and the hair, but this time around I also found one of my blunt end clay carving tools extremely helpful. You can see this tool to the right of Draculaura’s head, it looks like a little silver paddle on a wood handle. How I used this was I somewhat roughly scraped that tool around the inside of the head, but you don’t want to be so rough that you damaged the head. Essentially I would say be sure your are applying pressure. If you are doing it right all of the sudden large swaths of hair will just start disappearing from the head as you scrape. You can easily get all of the hair out of the holes in a minute or two using that tool. HOWEVER, you are still going to be left with all of the hair and glue clumps rumbling around inside the head, so you will still need to use your tweezers to pull them all out, and that is a long process.
Another thing to watch out for when removing the hair and glue clumps is that more often than not you will encounter glue blobs that are too big to be pulled out of the doll’s small neckhole. If you pull the glue blob as far out as you can, you can try snipping it with scissors to help break it up. I recommend getting yourself a cheap pair of nail scissors. They are tiny enough so you can fit them inside the neckhole slighting to snip away at glue blobs.
Finally your tools will get covered in that nasty, tacky, glue. You will need to wash them well after you are done using them, however most soap just doesn’t cut the mustard. I found that applying acetone with cosmetic pads to be very effective. Since acetone is a very strong solvent for paints and glues, it can clean the glue off with a little bit of elbow grease. You can find a big tin of acetone in the hardware store for under $10. Don’t bother with nail polish remover which is usually more expensive per ounce and often has other chemicals in it and is diluted. You must be cautious with pure acetone though! It will dry out your hands, and it will remove paint from surfaces it comes in contact with, so with that in mind it’s best you do this at a bathroom or kitchen sink.
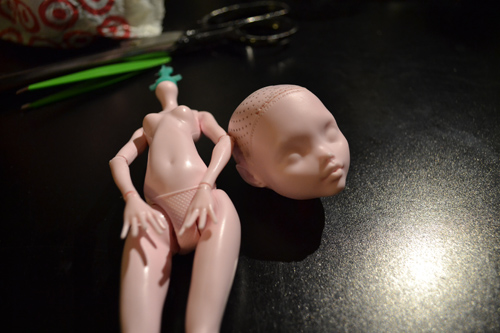
On the topic of acetone, that’s the solvent I use to remove the factory paint. Go slowly and use q-tips on the small areas because the paint will smear. Smearing isn’t the end of the world though, so if you do smear black eye paint down the cheek, don’t panic, just rub it off with a cosmetic wipe loaded with more acetone. In the end smearing just means there will be more work for you. Now, in the above image I have also wiped off Draculaura’s black skull paint because I plan to reroot her with mint hair and I don’t want a black base. If you are planning to reroot her in black or darker colors, you can feel free to leave the skull paint, in fact it is advised so you don’t have bright pink showing through any of your lovely black hair. 😉 Eventually I will be painting this draculaura’s skull in mint to match her hair.
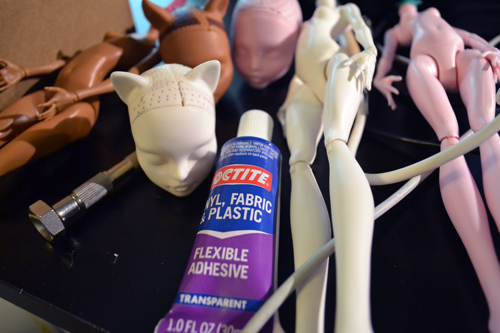
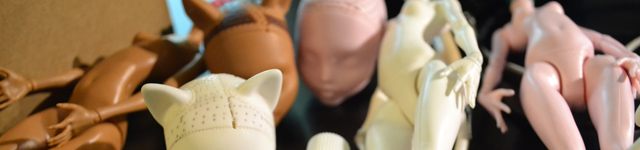
After you remove all the hair and paint, the next phase is to look for any gaps in the head and fill them with a flexible glue. Normally there will be some gaps around where the parts are since the needle holes are punched so close together. For an example, you can see there is a long gap in Catrine’s head from where her part came out XP. I’m going to advise you if you are working with Catrine to be very careful since the needle holes were so close that just the act of pulling out the hair turned it into one long channel. XP The glue I like to use to fix these gaps is Loctite’s silicon adhesive. It is clear and dries flexible, which is essential!! If your glue does not dry flexible, when you go to reroot, the glue will just pop right out. Depending on the size of the hole will determine how much glue you should use. For Catrine’s channel, I used too little glue at first and I had to go back and apply more. Also you will want to carefully apply it with just a toothpick so you can really shove the glue in the hole. If you are accident prone, you may also want to cover the face to assure you don’t drop the glue on the face. If you happen to get a wisp of glue somewhere on the face, you should immediately wash the glue off before it dries. Lastly, you need to leave this glue to fully cure for 24 hours, so plan on having that downtime and don’t try to work on the doll before that time simply because you think the glue feels dry, it really does need to fully cure to hold properly.
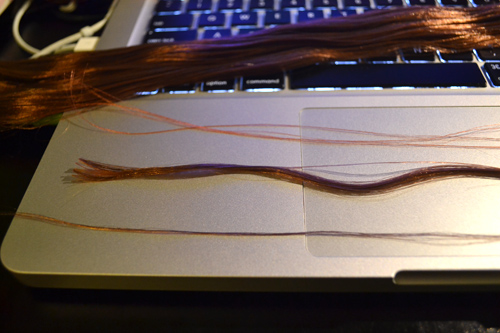
Ok so after your glue has fully cured, you are ready to apply the hair. Here I have a few strands of cut hair laid out on my laptop. You want to only use a small bit of hair per each plug. If you overfill your hair may become too unnaturally thick looking. The couple overlapping reddish strands near the back are about the right size. Keep in mind that when you use this hair with your reroot tool, you will be essentially folding it in half so the thickness will double. I think I explained how to use the reroot tool a little better in my last customs posting, but I will go ahead and write a little blurb here, just in case.
Basically your reroot tool is a handle with a needle on the end that has had it’s eye snipped at an angle. You then take this open ended eye and slip the section of hair at it’s center onto the needle. Hold the hair tight on there and then punch it into the dolls head. If you can’t visualize what I am talking about you can always check out some of the great re-rooting tutorial links I posted last year or so, which is here: http://www.genkigirl.com/dollyblog/?p=896
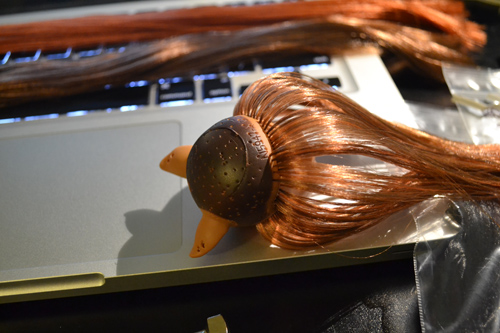
For me, when I reroot, I like to start at the back and work my way around. I normally do the bangs and any parts last.
Anyhow basically this is a tedious process as you fill up all the holes with new hair. Sometimes I watch TV or listen to podcasts or something while I do this because it can become very boring. As you are filling up all the holes, be sure to check for any thin areas in the hair. If an area looks rooted too thinly to you it is ok to use a needle and poke a few more new root holes. Just don’t go crazy with it, or you could wind up with your doll’s hair looking unnaturally thick. Also if at any time you feel you may have re-rooted too thickly, you can always pull the plug out and sometimes if it’s not too messed up you can reuse that plug elsewhere.
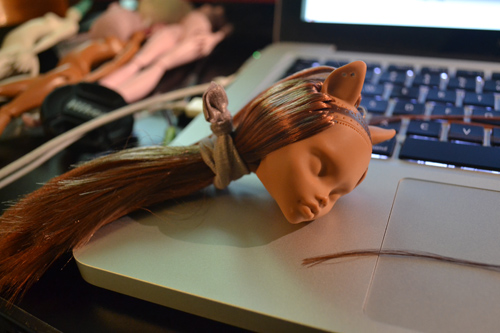
When I start laying in the bangs, I like to keep that hair separate from the rest. If you use the twist ties you get with your RestoreDoll order you can keep it nice and flat. If you don’t have twist ties you can use any no tangle hairband.

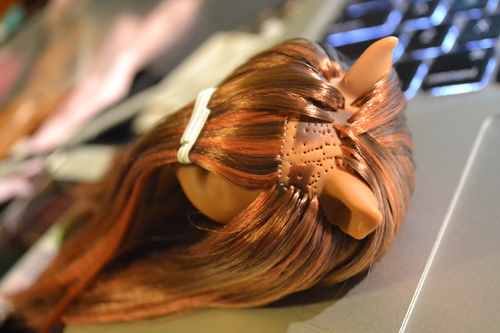
So here is the finished thatch on my Clawdeen. I found it easier to thatch a part that went between ear to ear for the bangs hairstyle. This isn’t the cleanest thatch I’ve done, but it was a learning process since this was the first time I had rerooted a doll with animal ears. I will go a little more in depth about thatching in part 2 of this posting, but you can also find most excellent thatching tutorials by following the link I posted earlier in this very post.
Well, see you in the next post which will be mostly about cutting and styling!