Second Wig Cap + Tips

So I decided I wanted to try to correct the flaws in the first wig cap and went on to make a second. I was successful in fixing some of the problems in the first wig cap and now I figure I will use that first wig cap for testing purposes. Anyway on with my findings…

eartamp

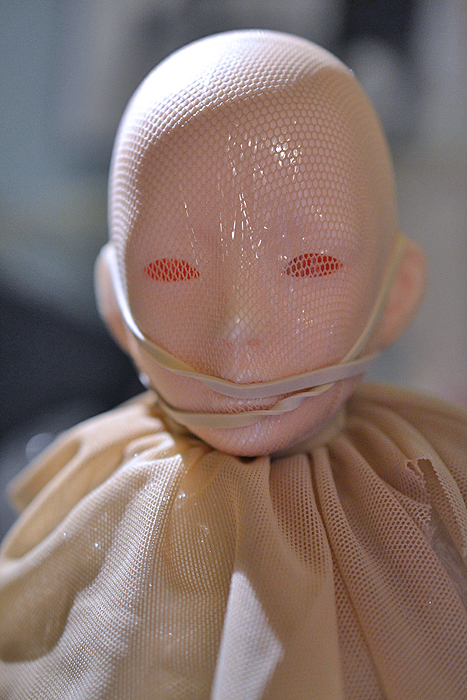
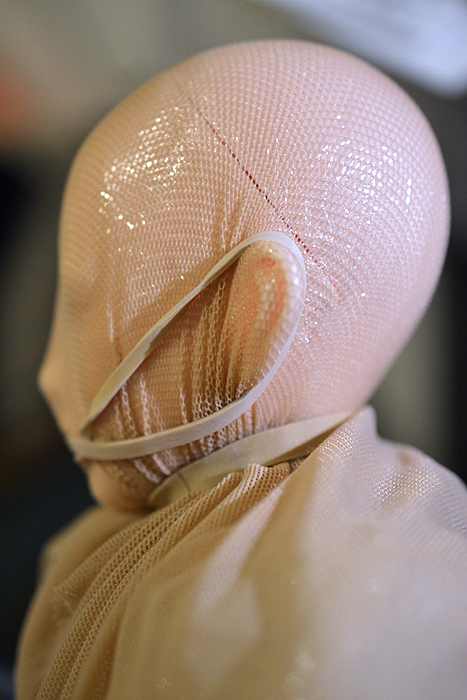
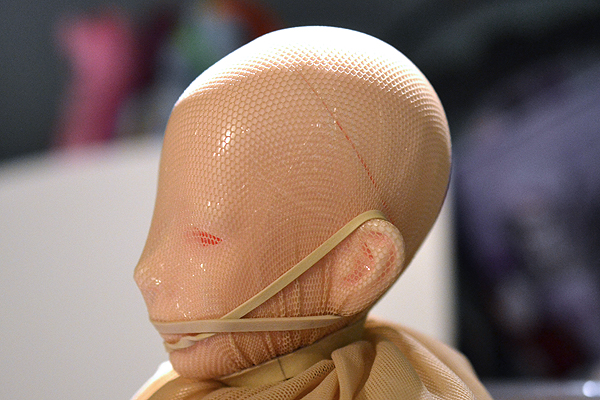
So the first thing I did to prevent the tenting around the ears is I used a rubber band and attached it across the front of the face from ear to ear. Above is the side view, and I’ll show the front side view below for better understanding. 🙂

eartamp02

So, doing it this way across the front of the face basically it helps keep the rubber band out of the gluing area on the nape of the neck. It also successfully tamps down those ear tents that happen for a much more form fitting wig cap.

wrinkles

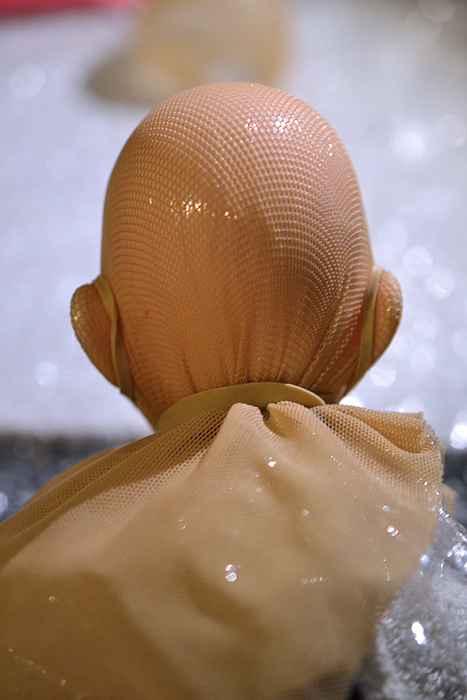
The second problem I encountered while making the first wig cap is that the fabric likes to wrinkle at the base of the neck and this makes for a less than smooth wig cap.

wrinklemigration

You can solve this by pulling all of the fabric over the ear so the wrinkles wind up in the front of the face where they will be cut off anyway. In the pic above I still have a couple wrinkles I need to move forward from the ear area, but with a little time it’s pretty easy to shove all the fabric around so the wrinkles are in the front.

wrinklesgone

And here’s the back of the head now with most of the wrinkles gone. Any wrinkles left over are below where I plan to glue.

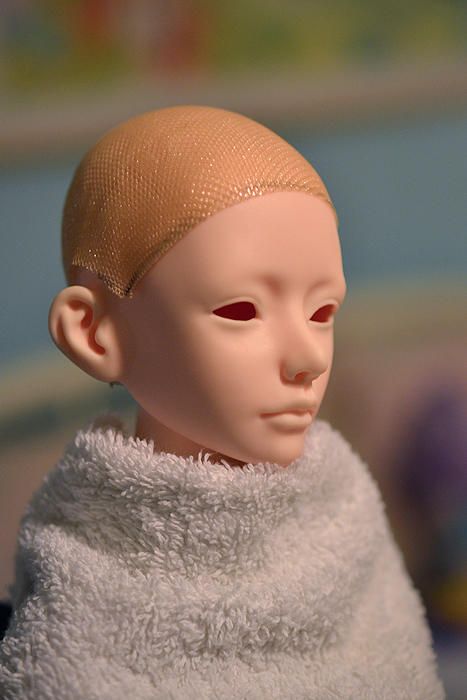
secondcap01

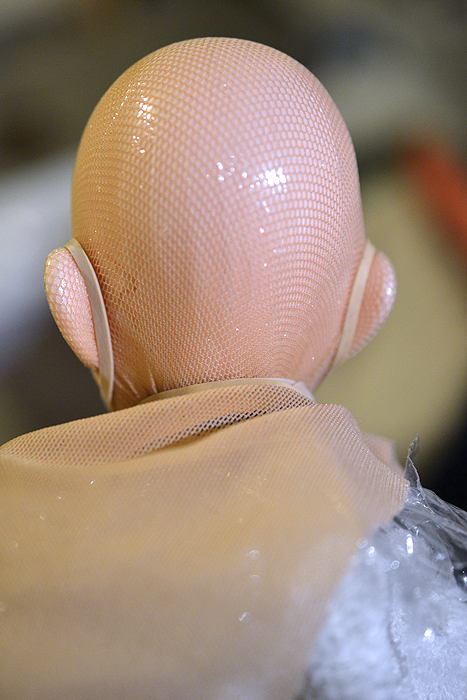
And here is the finished wig cap after I went through the gluing and trimming process. As you can see the cap around in the ear area is no longer sticking up.

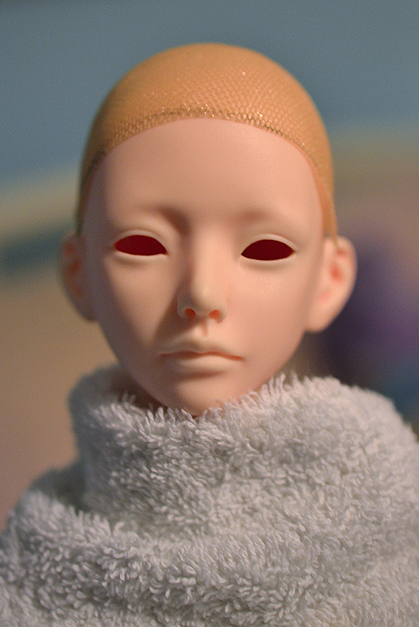
secondcap02

The left hand side still has a skooch-a-bit of a fly-up, but I figure that with the gluing of the wefts later that it will tamp down nicely. So, I think that about covers it for my experience making a wig cap using Loctite’s flexible vinyl adhesive. I now plan to start on wefting experiments using some cheapo costume hair. When I have enough info to share I will surely make another blog post!

Glue Testing for BJD Wig Making Part 2

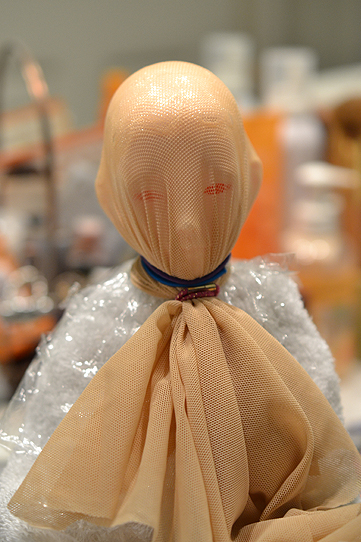
So I continued with my tests in the first part of this post and I went ahead and made a full wig cap using Loctite’s vinyl/fabric adhesive and the power mesh material. Following the directions in the wig making tutorial on DoA, I wrapped my Zaoll’s head in saran, covered her body in an old washcloth and then used old hair bands to stretch the power mesh fabric over her head.
glueprocess01

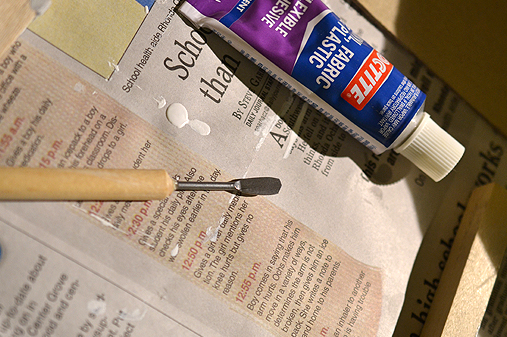
Here she is after having the fabric stretched over her and one application of the glue. I should also mention that is it going to be helpful to have a tool to spread this glue because it is very messy and is not pleasant to get on your fingers. I used this small metal spatula shaped clay tool which you can see below.
claytool

The glue is easily washed off the metal tool after you are done applying the glue, and if you happen to accidentally leave some glue on it you can easily scrape it off since this glue does not bond to metal well. After you apply the first layer of glue you need to let it dry for about 2 hours, then I recommend you add a second coat for durability.
glueprocess02

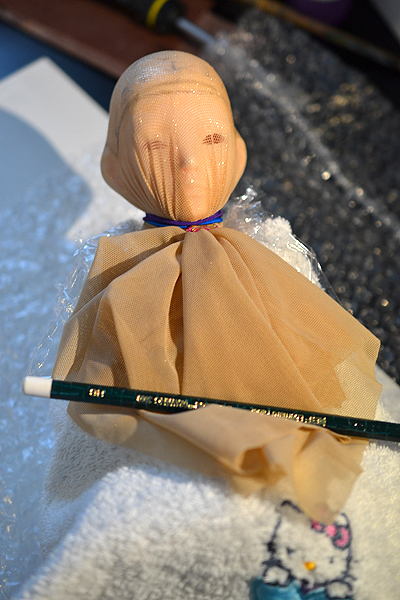
Here’s my girl now with her glue all dried and I started drawing out the hairline where I plan to cut the cap. It was recommended in the tutorial that you also mark which direction you want your hair to go, this is helpful if you are gluing small batches of hair at a go and have a complex hairstyle. For me I have pretty much decided to use a synthetic fiber that I plan to weft, so I only marked the top center and a few directional lines. Also my hairstyle plan is not very complex. You should do what you feel will be best for you.
trim01

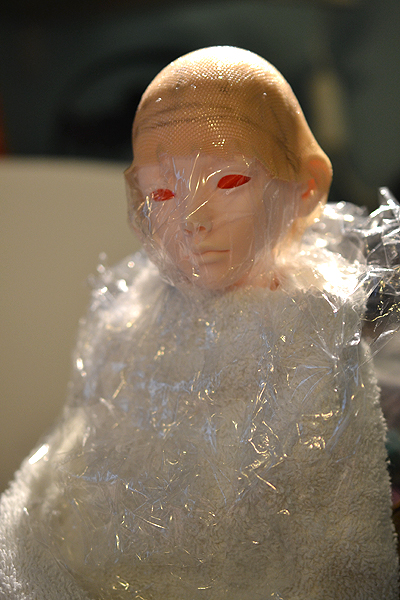
Here I did a rough trim, just taking off the excess fabric I had. In the next step I plan to cut along the lines I drew for the hairline.
trim02

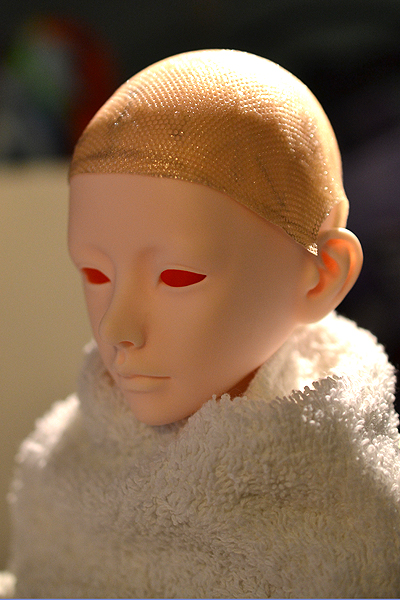
Here I have the cap mostly trimmed to where I want it to be. I may need to take off a little more, but it’s always best to cut off too little rather than too much since too much and you have to start over again.
problem

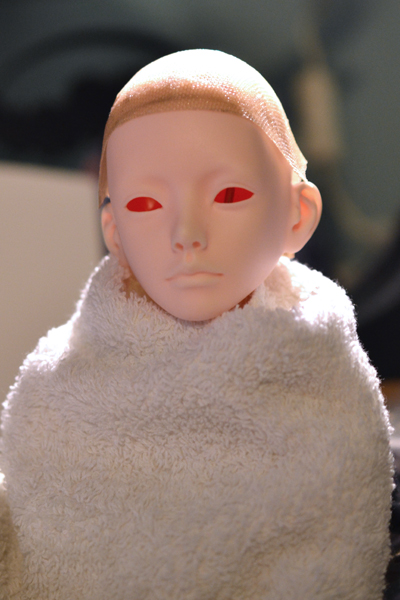
Here’s the front of the wig cap…one thing that I feel is a problem is that it sticks up a bit around the ears since the fabric naturally tented around the ears when stretched. I don’t know if there is a way to prevent this from happening, but I think I am going to try making another wig cap tonight and I will do some more experiments. Overall though I think it’s a pretty stable wig cap to apply hair to. Here are some of the pros to using this type of glue….
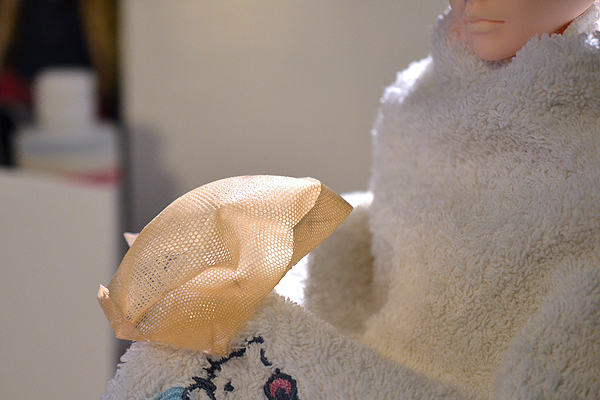
flexible

The first pro is that it’s flexible, you can flip the wig cap inside out if you want to. It doesn’t have much stretch though, especially with 2 layers of glue.
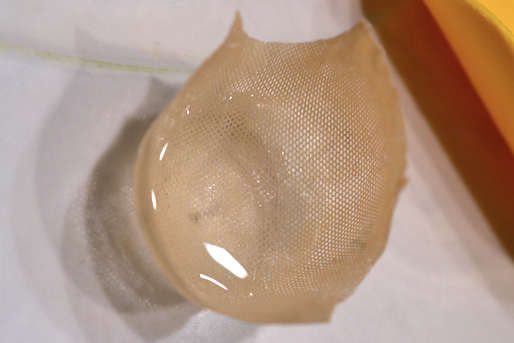
watertight

The second pro is that it’s watertight. It may be hard to see in the pic above, but I poured water from the tap inside the wig cap here. Because the glue is water resistant this means you can use synthetic fibers like saran and nylon and be able to use all of the wet styling methods for these fibers. Though I imagine this opens up wet styling methods to natural fibers like mohair as well. Also because this wig cap can get wet you can also maintain it like you would a normal wig, like giving it a wash or using conditioning treatments on it.

One last pro for using this glue is that because it’s rubbery, there is more friction when it’s on your doll’s head so it is less likely to slide off or around on you. Actually this fact makes me want to try a silicon glue next because maybe you can make wig caps straight out of that and have all the benefits of a silicon wig cap inside your actual wig.

The things that are not good about using this method is that it stinks. You’ll want to apply the glue in your bathroom with the bathroom fan running. Let me be clear and say it’s not particularly toxic like spraying with sealers as there are no particles than can find their way into your lungs, but if you have sensitive sinuses the odor could give you a headache. When the glue is dry however it doesn’t smell anymore, it’s only when it’s still wet does it smell.

The other con would be the dry time. It takes 2 hours to dry, though I applied my second coat of glue a bit sooner than that since it was dry to the touch before then. The last con would be the price. Each tube runs around $3, which compared to inexpensive PVA glues at $1 a bottle and more glue per bottle, well I think you can see the difference. This being said though $3 for a polyurethane based glue is not a bad price, and you do have all the benefits of a polyurethane glue.

Well, I will have more info for you as I continue my experiments. Right now the Loctite glue is working well for me, but I haven’t actually applied any hair or tried to make wefts yet, so I don’t want to pass judgement on this glue just yet. 😉 Anyway more to come!

Glue Testing for BJD Wig Making

After being inspired by the “Crafting your own custom angora wig” tutorial thread on DoA, which is here if you are a member, I started to think I might like to try to craft my own wig too. I read through the thread about what glues to use and etc.. and then I thought to myself, why not try to use Loctite’s Vinyl, Fabric and Plastic flexible adhesive. It is waterproof, completely transparent, and FLEXIBLE! On top of this the base of this glue is type of polyurethane which in theory should make it safe for use on our polyurethane dolls. I have also used this glue in the past to plug up holes in the heads of Monster High girls, so I already know it’s safe on vinyl and doesn’t have any bad reactions to saran hair.

So, the first thing I did before going whole hog on making a test wig, was to test the glue with the material. I used power mesh fabric which is the fabric I bought for making wefted wigs a while back. I wrapped a highlighter with saran wrap and using rubber bands I stretched the test fabric onto the saran covered highlighter. Then I applied some glue to the test strip and spread it around with my smallest palette knife. I left it for 2 hours to dry and here are my results below.

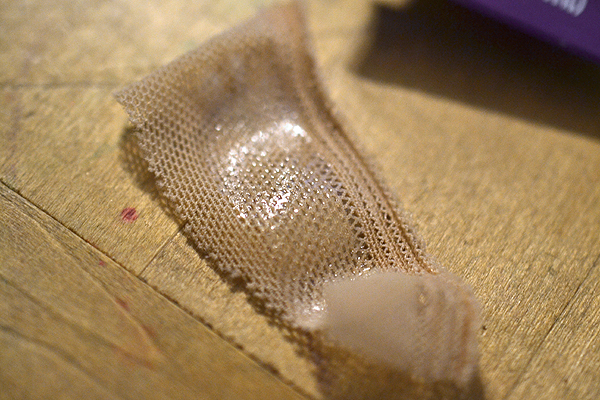
glue-teststrip01

I was really happy to find that the glue peels right off of the saran. That was my first concern, that possibly the glue could bond to the plastic thus not being a viable option for wig making since nobody wants a layer of saran wrap inside their wig. XP Thankfully it does not and it also peels off with ease. The above picture shows the side of the fabric that was pressed against the saran. It’s a little shiny, and because it’s a rubbery material it provides some friction which is an added bonus because that means it won’t slide off the dolls head as easily.

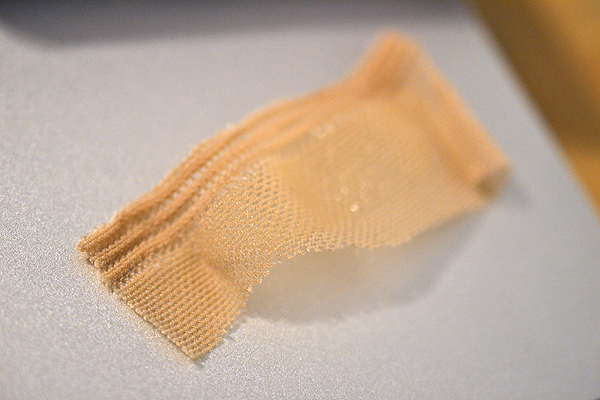
glue-teststrip02

This is the top side of the fabric that was not in direct contact with the saran, note how you can’t see any shininess from the glue. 😉 This glue dries perfectly clear and it will stretch a little bit. There is a decent amount of stretch along the grain of the fabric, but much less stretch against the grain. Stretching too hard against the grain (to the maximum you can stretch the fabric before ripping the fabric) will cause some warping of your fabric and you run the risk of tearing the glue. My suggestion would be to use two coats of glue for added stability before you even begin applying any hair.

glue-tubetest

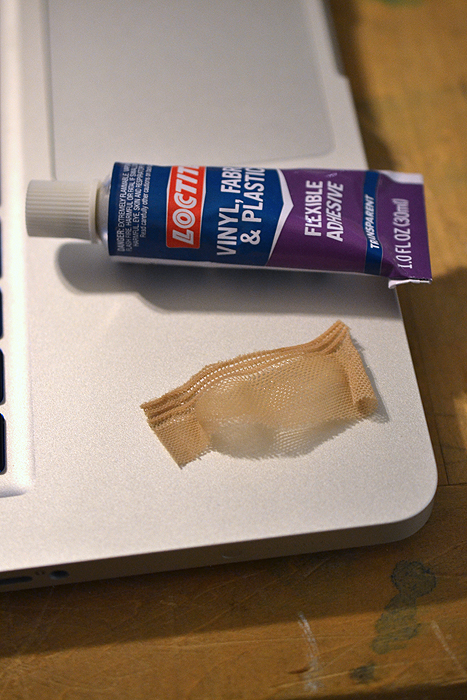
And here’s a final shot of the tube of glue that I used next to my little test strip. So far one of the potential drawbacks to using this glue is the wait time. You have to wait around 2 hours for it to dry. Another drawback is that with excessive stretching the wig cap can become misshapen. I am going to continue on with my tests since snow storms are keeping me inside and I will continue to report my findings as I go. My next step is to create a full wig cap for my Zaoll luv and then I should have more information for you.

Doll wigs, SD props and a Customs retention.

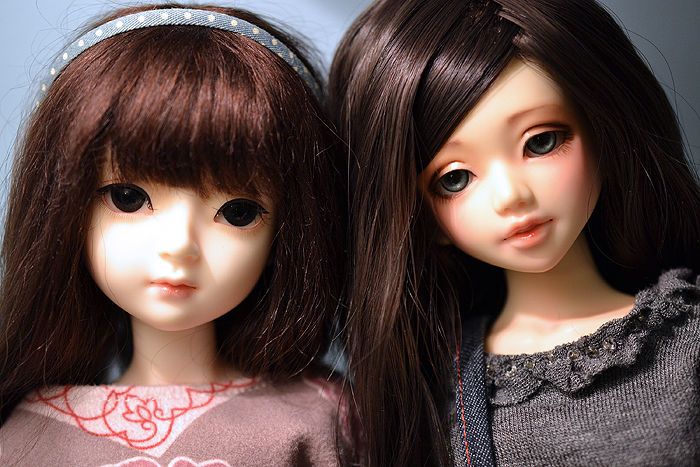
So a lot of doll related things have been happening, but I just haven’t had the time to blog since it’s been the holidays and I am trying to get everything together to go on vacation in January. The first thing that happened is the wig and headband I ordered in a For My Doll GO arrived. Here is a shot of Lulu in her new wig and Sona is wearing Lulu’s old wig.

sonaluli01

I have to say that this is the second wig I have ordered from For My Doll and I couldn’t be more pleased with the quality of wigs from that shop. Frankly I consider my FMD wigs to be of better quality than the one Leeke wig I own. Anyhow, I really like this wig on my Lulu, but I’m not sure how I feel about Sona in Lulu’s old wig. It’s cute and looks a bit more mature over her old pigtails, but I think I may still be questing for a wig yet for Sona. I think maybe I also need to try to buy other colors of wigs besides brown, but I just can’t help it!! I love dark brown hair and FMD’s “mild black” is the perfect deep brown.

Aside from the wigs, I’ve begun working on creating an SD sized bed for the first piece of furniture for my room box. I have my plans all drawn out and my wood bought, but I’ve only just begun cutting and painting. I really hope I get a chance to work on it some more before my vacation because I’d love to make a blog posting and share my progress, but I also have to double up on my work so I don’t have anything due over vacation AND I also have to finish hemming my dress among other vaycay prep.

Lastly the Dollstown elf body shipped a couple days ago and I was super excited to follow it’s tracking until suddenly after arriving in Chicago today it was detained by Customs saying “customs retention: other” D: I’ve never had this happen before so I popped on DoA to see if anyone else had this trouble before and sure enough there is a thread dedicated to it in the buying and shipping section. After reading through the thread I feel a little better since another user said that packages are processed through Chicago’s customs very fast. I’m really hoping that it only has that status since it arrived after 6pm on a Saturday and it just waiting for Monday’s work week to come around. I am going to be a bundle of nerves until this body arrives since I will be leaving on the 17th for vacation and it must arrive before then! D: I’m going to keep my fingers crossed that my package clears customs on Monday. The last thing I need is for it to get stuck in customs for a week or more and then ship when I am gone. I’ve heard where EMS packages won’t be kept for any longer than 5 days even in vacation hold mail. Oh man….I just don’t think I can say this.. D: enough…lol. If this has taught me anything it’s to not order things before vacation, even if it is in stock and will ship within a week and you still have a month left before vaycay so it should be “safe”…because apparently everything will go wrong.

Finally, Mio is here.

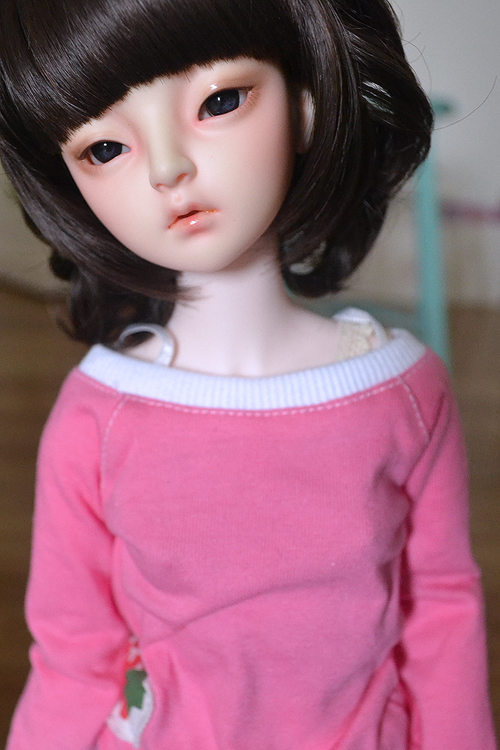
It was a long wait, but finally I got my Mio head. I was so excited to finally have her that I set about doing a face-up as soon as I could. I ended up staying up waaaay too late in the end, but I just had to finish her and get her put together. I am super pleased with my Mio/Zaoll hybrid. I love the Zaoll body and I was able to fit the Mio head right on the body without any trouble. Zaoll’s skintone is a little more pinky than the current Dollmore resin, but really it’s not by much. The first thing I did was do an all over pinky blushing to match her head with the body, and then I just started on the face-up. Really this hybrid was super easy to do and required no modding. Anyway here are a couple shots I got today

mioclean

I wanted to give her a really natural almost no-makeup face-up. I’m still really happy with how she turned out, but I’m thinking that perhaps I like her better with her brows showing rather than covered up. It’s easy enough to slide the wig back a bit. Unfortunately I don’t have any photos with her brows showing, but I’m sure I will in the future because I think she’s super adorable! I may have to tweak the face-up a bit though in the future because somehow one of the corners of her mouth that I penciled in, the pencil wiped off a bit after I applied the gloss. I don’t even know how that would happen since I sealed before I glossed. I also really like the For My Doll wig I bought for her, I think it’s a very good quality wig and I didn’t feel there were too many stray hairs I had to trim. It’s also a nice smooth fine fiber and really just excellent quality overall. Despite liking the wig though I think I still want to experiment with other wigs lol…I have an old red k-starr wig I’m going to try on her and I may order a mohair wig to see what that would look like.

Unfortunately the 16mm eyes I bought for her just look too big to me in her head. I ended up stealing Zaoll luv’s 14mm acrylic eyes to borrow for now. However when I removed those eyes I realized that somehow they had become cracked and broken. I am hiding the cracks the best I can, but the acrylic is pulling away from the printed iris which causes her to have a milky eyed look depending on the angle. I have never had a pair of acrylic eyes crack and break so badly. I have no idea what caused it since Luv was sitting in her box for the past month. In any case I probably won’t be trusting Dollmore’s acryclic eyes from now on. Their glass eyes are great, but I don’t want to run the risk of more broken acrylic eyes, even if they are cheap.

group

And here’s a quickie group shot of Mio on her Zaoll body with my two MSD girls. I like how Sona’s proportions lend her to looking like she could be a little sister. Luli’s proportions though don’t suit her for that, so I guess she a “friend” doll, lol….

Well, that’s it for now. I actually have other dolly news and dolly finds to share, but sadly I just haven’t been able to find the time to blog much this fall…been super busy! D: It’s ok though, I’m kinda happy to be busy, especially where it involves incoming dolls. 😉