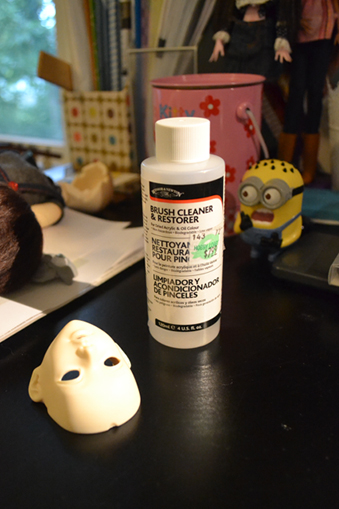
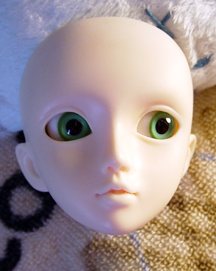
I finally got around to trying the Winsor Newton Brush Cleaner everyone seems to rave about on the forums and I thought I would share my experiences with using it for the first time. To begin with I have to say I am very skeptical of any sort of “miracle product”, which is how this stuff is made out to be, but I did find myself quite pleasantly surprised!
I used the brush cleaner to remove my Luli’s old face-up the other weekend when my Zaoll arrived, and I really was amazed because after rubbing the face-up with a cotton ball soaked in the stuff, the face-up started wiping away quite easily. You do have to apply a little bit of elbow grease however in comparison to using acetone, so it may take a few minutes more to wipe the entire face. The benefits to using the Winsor and Newton Brush Cleaner is that is doesn’t contain harsh chemicals that can potentially eat the resin. I’ve also read where people will let their doll heads soak in a solution of the stuff without incident, but eh…I’m not willing to try that yet. The drawback would be that it is going to take you longer, but I think if that’s the payoff for having a safer less harsh chemical, so be it.
I do want to say a word about being able to get into the tiny crevices of your doll with the cleaners though, because they differ here too. If you are trying to get dark corners out of mouths with the brush cleaner alone, it is going to be hard. For the most part on my Lusis I am regaled to using an old detail paintbrush to try to rub the cleaner in her mouth corners. You really have to apply pressure to remove heavier paints, and of course it’s difficult to apply pressure with a tiny paintbrush. In the end I gave up and gave the hard to reach crevices a wipe with the acetone since acetone can easily break down paints without any scrubbing.
In the end I think the Winsor and Newton Brush Cleaner is a great tool to have in your arsenal, but I wouldn’t ditch your acetone either. I find that Acetone can be helpful in removing tough spots left behind by the brush cleaner. You may be thinking then, well why buy the brush cleaner, why not just use acetone and be done with it? Well I shall tell you why….Each time you use acetone it does eat away at the surface of the resin, albeit in small unnoticeable minute amounts. However over time that wear can add up, so the more you can get away with cleaning a head without it, the better for the resin. If you only use acetone for small touch-ups, then that means less damage to the resin.
I realize everyone kind of has their own opinions when it comes to face-up removals, but I think I will continue to use the brush cleaner, and still hang onto my acetone for the tough business. I definitely will be glad to get away with using less acetone and I know my fingers will be glad for it too!


 So for a while now I had been dissatisfied with my Yara’s face-up, as her eyebrows seemed too close to her eyes and her lip color was a little too bland for my tastes. Being an artist I already knew I had all of the pastels and watercolor pencils to do those nice natural face-ups you see online, so after reading some more tutorials I finally decided to take the plunge and I went out to grab a fresh can of Testors and some acrylic gloss.