Preventing clothing dyes from staining your doll.

After my incident where I had to scrub my new resin baby’s butt since the cotton fabric from the new clothes he was wearing left black marks on him, I decided it was high time I did something about the clothing to prevent it from happening again.

Now everyone will tell you to wash your clothes before putting them on your doll to get excess dyes out of the clothing, and this is a good practice because a lot of the time it’s the excess dye that is the problem and not the fabric. However, everyone and their mother’s sister’s niece on DoA will also tell you to then soak your doll’s clothing in a solution of vinegar and water for a couple hours to set the colors, which is very nearly false as I recently found out. Of course it can’t hurt to do this as long as you wash and rinse thoroughly afterwards, but it will not set any dyes on cotton. It will however help to set some acid based dyes on fabrics that have been acid dyed such as silk, nylon and wool, but definitely not cotton.

So, you might be wondering now how in the world you can set the dyes on your dolls cotton clothing which probably take up the majority of your doll’s wardrobe unless you have a bunch of barbie/fashion doll synthetic clothing. The answer is a product called “Retayne” which is a dye fixative that quilters use to prevent one fabric from staining another if they need to wash the quilt. Thankfully Retayne is cheap, you can get a bottle of it for around $2 in stores like JoAnn’s where they also have lots of quilting supplies. You can also order it online from JoAnn’s and various other crafting quilting sites, BUT Amazon lists this stuff for $6, so don’t be fooled into wasting money!

Lastly I want to say that I found out all of this info from this very informative site I found called “All About Hand Dyeing”. You can read the very same FAQ section that I read here:

http://www.pburch.net/dyeing/FAQ/settingdye.shtml

The site also has lots of other useful information on special washes to help remove excess dye, as well as more information on Retayne and it’s uses. Also if you ever have the need to dye something, this looks to be a good resource for that too!

A sorta 1:12 scale mattress for a BJD tutorial

I call this a “sorta” mattress tutorial because I have left out some steps picture wise and also this may not necessarily be the best way to make a bed mattress, but it’s how I worked through some construction issues after making my 1:6 scale doll bed and mattress. I thought I would share my experiments just in case they might be helpful to others, as knowledge can always be built upon to create even greater things! If you happen to have some better ideas on mattress construction feel free to comment and share them! Anyway now on with the sorta tutorial!

Read the Tutorial

Dollhouse Progress & Using Fabric Hinges

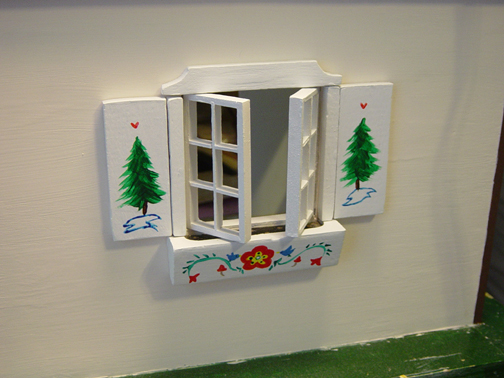
I’ve been making more progress than this on the dollhouse, but a lot of that has been spackling, sanding and painting, all of which don’t make for the best of progress pics. I did however finish my first window finally. Because I really don’t like those tiny brass hinges, and I can’t use pins because of the way the house has been constructed, I decided I would try out using fabric hinges. I had read about fabric hinges online while looking for dollhouse related tips while building my last dollhouse, but there wasn’t much in depth information about how to create/use them. Anyway I’ll go ahead and share my experiences here, if anyone else is interested in trying out fabric hinges to see if they work for them. Just keep in mind I’m doing this on a 1:12 scale dollhouse, not playscale, and I’m not sure how it would work with playscale.

Read on behind the cut

Dollhouse Rehab – Day 3

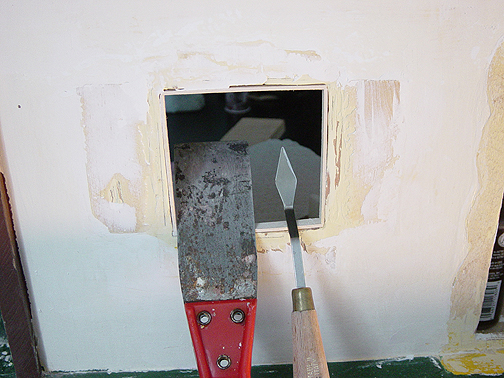
I got all of my spackling and sanding done today, and currently as I type this, the first coat of paint is drying on the exterior of the house. I thought I would share a spackling tool tip though. It is something I kind of took for granted in having being as I am an artist, but the artist palette knives you can get at any art supply are really excellent spackling tools for those hard to reach spaces. You can see my palette knife on the right in the above pic, resting next to the red handled spackling knife. You can get palette knives in varying sizes and they are also inexpensive. I got my palette knife for a couple bucks or less. Of course some art supply stores have better prices than others.

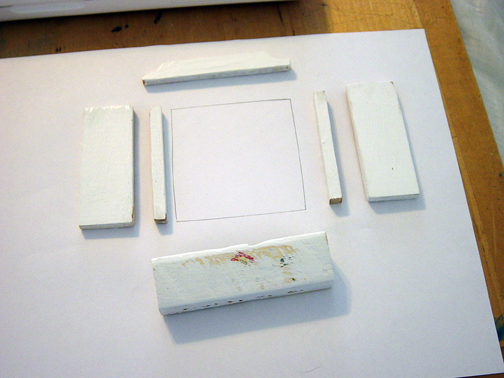
I also decided to start sanding down all of the exterior window trimmings and I wanted to start planning to put them together, which brings me to my next tip. When dealing with custom windows and you have no plans to go by, you can always take a sheet of copy paper, and using a firm back board, hold the paper up to your window hole and trace your window in pencil. This makes a great guide for you to sit at your table and put your windows together. Of course for this house I think I will have to do each window separately seeing as there seems to be subtle differences between each hole my grandfather cut.

You may also notice in the picture that a bit of the old decal is showing through from the bad paint-over I did a long time ago….The yellow color you see is actually how badly the clear part of the decal yellowed, so yeah, it was not a pretty sight. I plan however to at least attempt to re-create those designs using my acrylic paints. We’ll see how that goes. I did manage to find a picture of this dollhouse from the planbook online, so I will use that as my guide for the detailing.

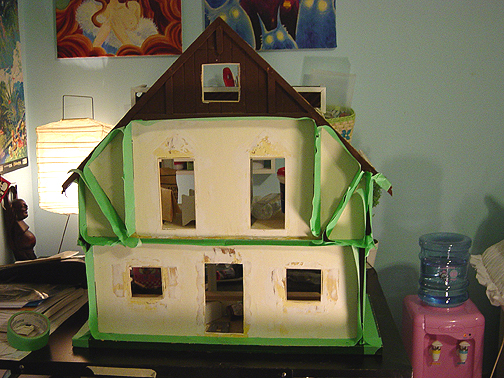
And here is a full progress shot with the dollhouse all taped up and ready to be repainted. I bought a warm beige color from Lowes the other day. I think it will be a tick darker than the last color on there, but when I looked at it in the store it provided nice contrast for both the white and dark brown trim. Well, I can see from here that my paint is dry enough to take a second coat, so I shall be heading off to do that now. I’m note sure what tomorrow’s goal will be, but I imagine it will be window related. 😉

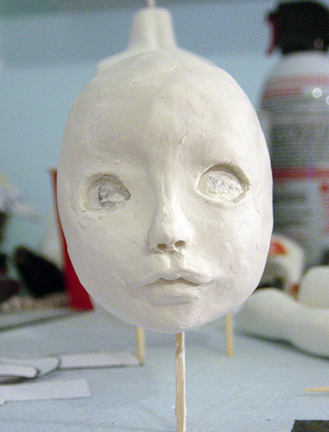
Cookie’s Progress – 1st Stage Face Sculpt

This is the first stage of sculpting cookie’s face. Obviously there is a lot more work that needs to be done, but the clay is just getting way too sticky at this point so I decided to give it a rest for the night. I’m going to let her air dry and sand and add more clay to her tomorrow. Hopefully she will come out looking as cute as my drawing. I think I’m on the right track, but boy, sculpting is hard work. :p