Making 1:12 Scale Polymer Clay Dishes

I felt like making a set of custom dishes for my 1:12 scale dollhouse, so after reviewing some tutorials online I played around with creating some plates and bowls. I ended up having a lot of fun and sorta getting in the zone while creating these that I ended up making quite a lot. XD

At this point all of the plates and bowls have been fired and I’m working on sanding and refining them. The beige plates turned out a little darker after firing than I wanted. I was aiming for more of an off-white plate, so I may wind up painting them a lighter color. I also have plans to attempt to paint some designs on all of the plates. The beige plates I made specifically to match my kitchen and I wanted to do a red mushroom motif on them. I’m not certain what I want to do with the white plates and bowls. Originally I imagined doing something a little shabby chic looking, but the style of dishes might not lend to that. Maybe it’s time to review Crate and Barrel’s dish designs, lol.

I think I made more than I need, and I kind of feel like experimenting more with the polymer clay, so I may wind up making some of these to sell as well. If I do offer any for sale I’ll be sure to make a posting.

New Photoshoot

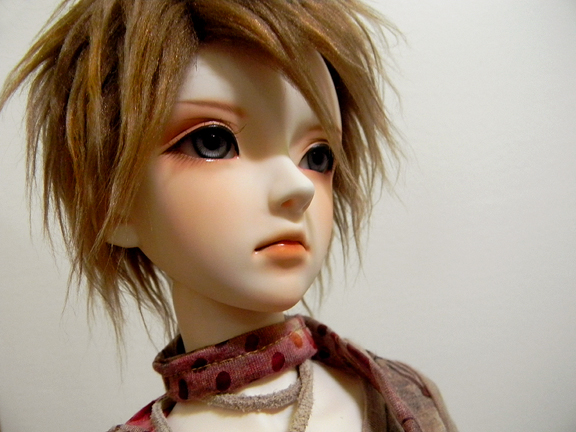
Ash’s new wig and cargo pants arrived a couple days ago and I just now got around to snapping some new pics of him. The wig and the pants both came from Sunny’s World. Overall it was a really good transaction and the pants are especially wonderful for the price. The wig is a really great color and matches Ash’s face-up really well, but I was a little surprised to find that the wig is a little thin. I think since Ash kind of has a big head compared to other SD13 sized boys, that a fuller wig will be better. Other than being thin though, the color is great and it’s very soft and manageable.

Anyway if you’d like to see all of the new photo’s I’ve uploaded, you can find them in my flickr. You can click the flickr icon in the right sidebar to go there, or here is the link as well.

http://www.flickr.com/photos/tsukiyonomiyu/

Bedding Finished!

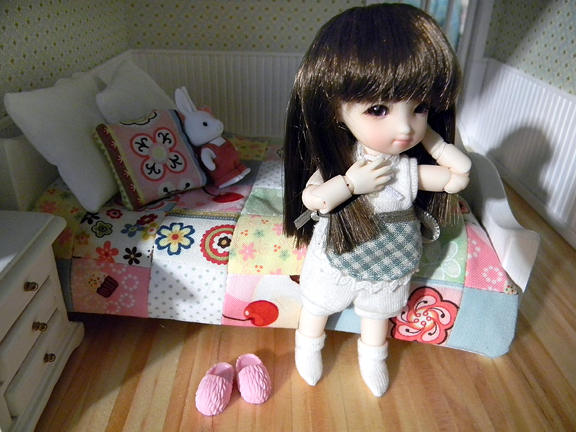
I finished the bedding this afternoon and I decided to put the bed together and snap a few pics of it in the upstairs bedroom of the dollhouse. I’m pretty pleased with how it turned out, though I think I may make some some more throw pillows to fill out the bed a little more. I posted a few more pictures of the room and my Brownie Haha in my flickr account which you can check out here: http://www.flickr.com/photos/tsukiyonomiyu/

At this point I need to focus on drawing, so I’m putting away the dollhouse until possibly this weekend. I’d like to finish out the bedroom a little more, but I still have to put in some flooring and wallpaper, so I should probably focus on that stuff before I do more decorative things. Well, enough rambling! Time to do my comic work.

Laying out a 1:12 dollhouse quilt.

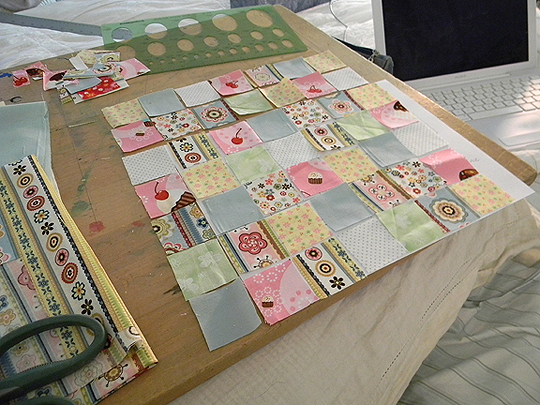
After finishing the bed mattress I got started on sewing the quilt that I want to go on the bed. I can’t believe how much time I spent just placing all of the squares until I felt I had proper balance. ^^; Anyway this is the final layout. It looks large right now because I allowed for a 1/4 inch seam allowance. Each square will be about 1 inch after sewn together.

Since laying it out, I already got started sewing it together. So far everything is going OK, but it’s being a lot more labor intensive than I had originally imagined. Also, despite measuring everything countless times and planning before any cutting began, somehow my quilt is winding up just a tad bit too long from the head to the foot of the bed. I think I’ll be able to work out all of the issues though when I sew on the backing, and it should still look cute. I can’t wait to get the bedding all finished, then I’ll have at least two pieces of finished furniture for one of the upstairs bedrooms and I should be able to take a few cute pics.

Preventing clothing dyes from staining your doll.

After my incident where I had to scrub my new resin baby’s butt since the cotton fabric from the new clothes he was wearing left black marks on him, I decided it was high time I did something about the clothing to prevent it from happening again.

Now everyone will tell you to wash your clothes before putting them on your doll to get excess dyes out of the clothing, and this is a good practice because a lot of the time it’s the excess dye that is the problem and not the fabric. However, everyone and their mother’s sister’s niece on DoA will also tell you to then soak your doll’s clothing in a solution of vinegar and water for a couple hours to set the colors, which is very nearly false as I recently found out. Of course it can’t hurt to do this as long as you wash and rinse thoroughly afterwards, but it will not set any dyes on cotton. It will however help to set some acid based dyes on fabrics that have been acid dyed such as silk, nylon and wool, but definitely not cotton.

So, you might be wondering now how in the world you can set the dyes on your dolls cotton clothing which probably take up the majority of your doll’s wardrobe unless you have a bunch of barbie/fashion doll synthetic clothing. The answer is a product called “Retayne” which is a dye fixative that quilters use to prevent one fabric from staining another if they need to wash the quilt. Thankfully Retayne is cheap, you can get a bottle of it for around $2 in stores like JoAnn’s where they also have lots of quilting supplies. You can also order it online from JoAnn’s and various other crafting quilting sites, BUT Amazon lists this stuff for $6, so don’t be fooled into wasting money!

Lastly I want to say that I found out all of this info from this very informative site I found called “All About Hand Dyeing”. You can read the very same FAQ section that I read here:

http://www.pburch.net/dyeing/FAQ/settingdye.shtml

The site also has lots of other useful information on special washes to help remove excess dye, as well as more information on Retayne and it’s uses. Also if you ever have the need to dye something, this looks to be a good resource for that too!