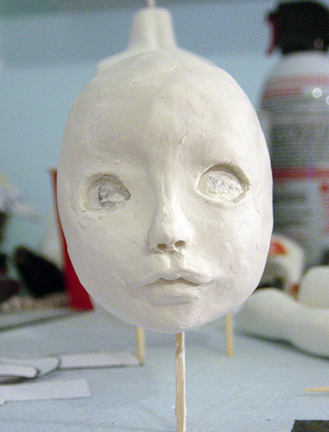
This is the first stage of sculpting cookie’s face. Obviously there is a lot more work that needs to be done, but the clay is just getting way too sticky at this point so I decided to give it a rest for the night. I’m going to let her air dry and sand and add more clay to her tomorrow. Hopefully she will come out looking as cute as my drawing. I think I’m on the right track, but boy, sculpting is hard work. :p
Barbie Chair Repaint
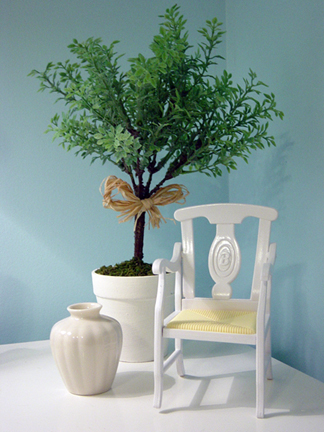
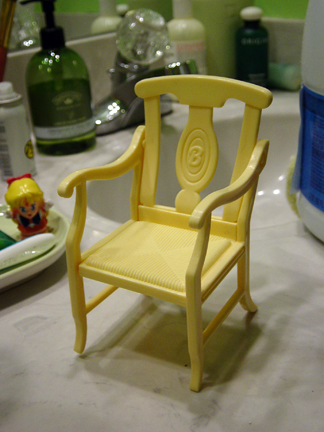
I was finally able to finish my Barbie chair repaint project after the humidity and storms broke a little bit yesterday. I’m not sure what set this chair came from, but it was imprinted with the date 1992. I was surprised to receive this chair in the bag of Barbie goods I got from my aunt, because I have never seen a Napoleon backed Barbie chairs before. I consider this one of my most successful repaints so far, and I think it will be a nice addition to the living room of the dollhouse.
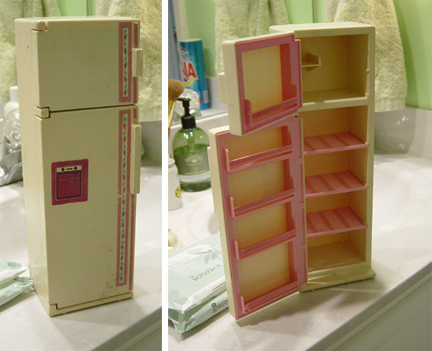
After having a success with repainting, I’ve been considering repainting the sweet roses fridge I have since all of my “whitening” experiments have failed. I started by soaking the fridge in bleach, and after several hours with no change I decided to give up. Next I thought I would try the hydrogen peroxide and oxi-clean bath, but after soaking all day and night with no change in color I gave up and used the solution to clean the bathtub, lol. So after chemical lightening failed me I thought I would test sanding a small corner of the back side of the fridge, which actually lightened the fridge slightly. I decided against sanding to lighten the plastic however, because the amount of work that would be required to sand and buff the entire fridge was out of proportion with the results. I’ve figured out how to remove the pink shelves inside, but I still haven’t figured out how to remove the pink inside door shelves from the door. This presents a problem for repainting, thought I imagine I could just tape over the inside of the doors and not paint them. Anyway I’ll stop my rambling for now and just leave you with my before shot of the barbie chair before the repaint.
Delays and Dalliances
I haven’t been able to make any more progress on refurbishing my barbie fridge or any of the other furniture I have received because of the stinking weather. :p Every day it has been hot, humid, stormy and mostly overcast. So right now I have half of a old barbie chair painted with the other half waiting for a drop in the humidity. I’m also still waiting for sun to try a second type of bleaching experiment on the sweet roses fridge which involves sunlight, but I’ll get more into that later.
I imagine I should just work on Cookie some more, but a migraine has kept me in bed most of the day, and I’m just feeling too yucky to motivate much. XP So basically I’ve been spending this down time with my laptop in bed and looking at other dolly sites and such to satisfy my dolly obsessing. I managed to find a couple interesting dolly blogs that have a good deal of 1:6 scale diorama info or eye candy, which I thought I would share.
The first one is Corsetkitten’s Workshop:
http://corsetkitten.com/blog/
This blog is heavy into 1:6 scale dioramas and fashion dolls, but she does have some Blythe and Momoko. She has some “making of” tutorial type bits on making 1:6 scale dioramas and also makes some of her own miniatures. Lots of informative dolly posts as well as just random doll blabber which is fun to read too!
The second site is Nerea Pozo:
http://nereapozo.blogspot.com/
This blog is pretty much Lati tinies and Blythe exclusive, though occasionally I see some postings on minis. The big thing here though is the eye candy! She makes these incredible little dioramas for Lati tinies or Blythe dolls that she sometimes sells. There is less so much tutorial information here, but looking at all the eye candy is sure to give you ideas, and they are just too gorgeous not to look at. Also if you visit her domain, nereapozo.com you can also see some of her custom Blythe and Blythe artwork.
I would absolutely love to hear of any other sites other people may have found, because it’s always nice to have new sites to visit, especially when you are ill in bed. Feel free to comment and share any other dolly links, but do keep in mind that if you post more than two links my spam filter is going to flag it for me to check before it can appear.
Barbie Sweet Roses Fridge – Refurbishment
One of my aunts is an antique dealer and knowing I was trying to put together a playscale dollhouse, she kept an eye out for old dollhouse furniture for me and found some of the Barbie Sweet Roses furniture from 1987. She actually found more than the fridge for me, there is also a kitchen set, a cabinet, sofa, chairs and a few other things, most of which are from the Sweet Roses collection. Anyway I decided to tackle the fridge first as I have been wanting a new fridge since I kinda mucked up the repaint of the hot pink barbie fridge I had.
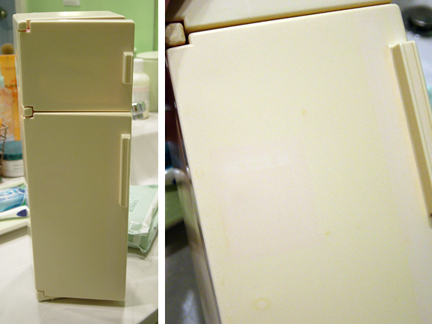
This Sweet Roses fridge had been in an attic and it has yellowed with age and heat. I know that originally the fridge was white, and inside there is some light pink detailing. The great thing about this Barbie fridge is that it’s quite a bit deeper than the current barbie fridges on the market, which means it can hold more cute re-ment food! But more importantly this Barbie Fridge from the 80s is more to scale than the newer fridges, meaning when Pullip goes to open the top freezer, she will actually be looking into the freezer and not looking at the top of the fridge. This old fridge is also much better put together as well, for example the shelves inside are nice and level and don’t sag like the latest fridge does. XP
So the first stage of refurbishment was to scrub down the fridge which was a little dirty, and to get the old yellowed and torn decals off of it. It took some effort to get the decals off, because the glue was really holding them on there. With the newer fridges, just a 15-30 minute soak in hot and soapy water will pretty much remove the cecals easy, but this one required more elbow grease. In the end after a soak in warm soapy water wasn’t doing the trick, I broke out the isopropyl alcohol and rubbed it down, finally removing the decals.
After removing the decals I noticed that the plastic underneath wasn’t as yellowed as the rest of the plastic, which is unfortunate. You can see it just barely in the pic above. Now this leads to me to decide what to do next. I’ve heard that putting yellowed plastics in a bleach or hydrogen peroxide bath can help remove yellowing, but I’ve also heard that it can make the plastics more brittle. I have also considered a repaint, but after my last failure, I’m not too keen in wrecking yet another fridge. There is also the fact that the way this fridge it put together means I can’t separate parts nearly as easily for repainting either. Whatever I decide to do, I’ll probably continue to post the results here.
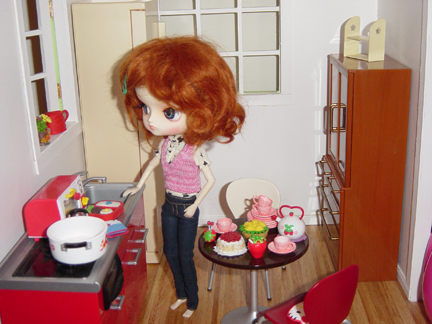
For now though I have placed it in my dollhouse kitchen and been messing around with furniture arrangement. My kitchen is really coming along now, especially since my mother found me the brown re-ment china cabinet when she was shopping in Pittsburgh. The dimensions of the Sweet Roses fridge works really well for my kitchen, it fits neatly in the space between the two windows, but I would need to make some sort of cabinet to go in the space between the red re-ment kitchen and the fridge. I would also eventually like to make some red wall cabinets to match and pull the room together more. Still a lot of work to do, but little by little I am getting there. 🙂
Dollmore & Asleep Eidolon Resin Comparison
After getting my Sona out of her box, one of the first things I wanted to do was to see how the tint of Dollmore’s resin compared to Asleep Eidolon’s resin. The Dollmore kid body lacks the mature features that many of the other female MSD bodies have, so there are many Dollmore kid owners who have been pondering how they can get a more mature body for their girls. Of course I am in no hurry to hybridize my Sona because she is just to perfect to me right now, but perhaps after her newness wears off I may find myself more willing to embark on experimentation. Anyway on with the comparison pics.
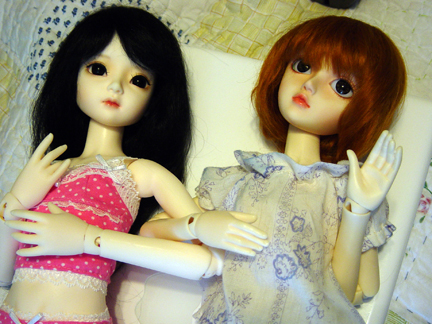
In this pic we have Sona on the left and my AE Yara on the right. My AE Yara has the old style slim body, and the AE girls are now on their third body type which is no longer as slim. I don’t know if AE’s resin color has changed at all between incarnations but if I find any definitive information I will be sure to edit this posting. Anyhow from the pic you can see that the two resins are very similar and I would say they are a pretty good match. AE’s resin is ever so slightly more cream colored and Dollmore’s is slightly whiter, but you really have to sit there and analyze and nit-pick in order to see the difference.
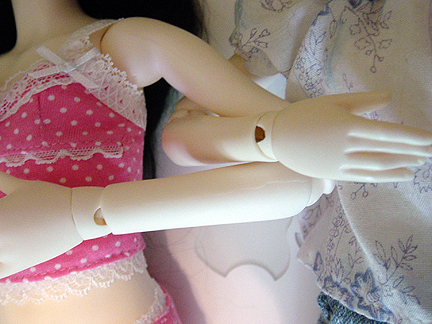
Anyway here is a close-up with more natural light from the window for those of you who would like more comparison shots in different lighting. Hopefully these pics can help people with their decision making when they are considering a different body for their Dollmore Kid.

