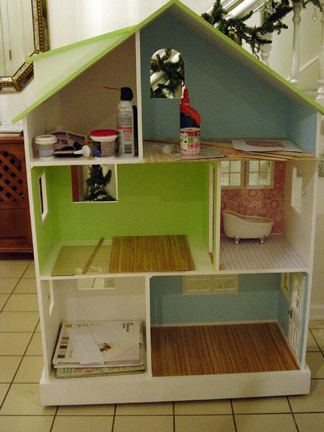
Here is another overall project shot of the house. It’s been a couple days though since these pics, so I have even more done now than the photo shows. As I think I said before, it’s all the small detail work now, trimming out the windows and the rooms.

I shot this pic of the finished living room with the flash. I wind up working on the house off and on all day and then take progress pics at night. Unfortunately taking pics at night isn’t the best of things. Anyway the flash made the aqua paint seem lighter than it actually is.
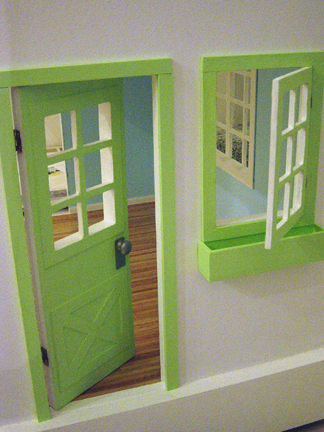
Here is the front door area. I wanted to have working doors on this house and also some windows you could open and close for photo ops, and well fun also! Some of the windows I am framing out though are not hinged. I am also not putting any type of fake glass in the windows, because I am just not that fond of it, however as you can see from my photos I have been adding the detail of wood sashes as it makes things look more charming.
I can’t remember what I’ve already discusses by way of working with hinges, so if I repeat myself forgive me…The doors are hinged using 1/2 inch hinges. These were attached with screws and are very sturdy so these doors can be played with, without any fear of them coming off. The windows on the other hand are only 1/4 inch thick wood so I’ve been having to make do with small 1:12 scale brass hinges. These are the type of hinges that you have to nail in with tiny brass nails, and not surprisingly they pull out easy. I’ll be frank, using the 1:12 scale hinges for playscale is sucky, because they are not durable enough and can’t handle the stress of the larger windows and the repeated usage. However because these hinges were all I could find to hinge my windows, I’ve been having to deal with them, and I can share a few tips with you.
My first tip for working with the 1:12 scale brass hinges is to start your nail hole with a straight pin. By starting the hole with a straight pin you create a channel to get it started and thusly it makes it easier to hammer those tiny blasted nails in. Secondly you’ll need to use a nail set to really get them in there good. My second tip, and probably unorthodox one, is that once you have your hinges in place, and you know that everything is functioning, you can very carefully put a dab of super glue over each nail to be sure to secure your hinges extra tight to the wood. You have to be careful though because if you accidentally get the glue in your hinges you will ruin it. I generally do one side at a time and prop it up so that if the glue starts to run, it will run away from the middle hinge part. I imagine there is a possibility that you could try to forgo the nails altogether and just superglue the hinges on, but I thought perhaps glue and nails might be sturdier. My final piece of advice is to inset your hinges. I inset my hinges by using a dremel to gently shave out a small patch of wood where my hinge will set. I also have a preference for H hinges as they cover a little more area, but you may have your own ideas of what you want to work with.
Well, that’s it for now. I’ll be sure to post more progress later even if it is a little late.


 Since ordering my Dal, I have been pouring over all of the doll wigs on various shopping sites. I wanted to find a redhead wig for my Frara that was more on the natural side of red. In the end, partially because there is a Luts Go happening on the Dolly Market forums, I decided to go with the carrot mohair wig in the pic. It was either going to be the mohair or one of their heat resistant wigs, because I think I’d like to move on to wigs that have more styling possibilities. I just hope this wig looks good on my Frara when it arrives, because I am now officially tapped out of Xmas money and I need to tighten up my purse strings so I won’t be able to buy any more wigs for a while.


