SD/SD17 size Room Box Window

I’ve made a lot more progress on the room box, but I just haven’t had much time to blog. I wanted to share with you though my process for creating the pin hinged window. All of these pictures I was a bit lazy and just took them with my iphone camera since it was convenient, so please excuse the photo quality and also my ugly dry hands….They just get so dry and bleh whenever I’m doing woodworking. XP

Ok, so for the basic construction of the window, please refer to my last post where I showed how I laid out the frames, sashes and glued and painted them and etc… Here I will be focusing on the hinges and attaching the window to the house.

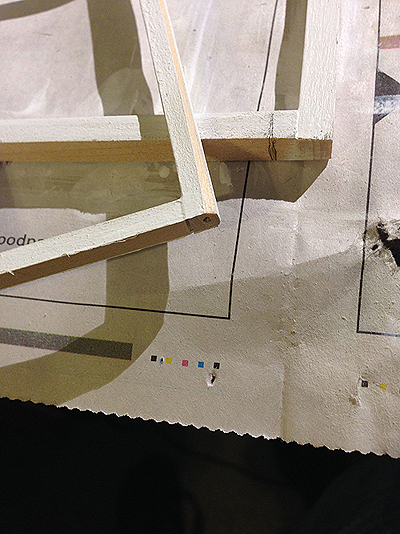
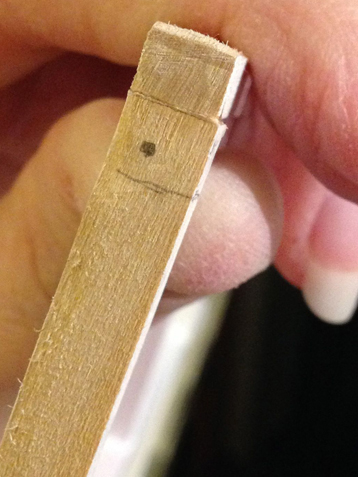
windowpinmark01

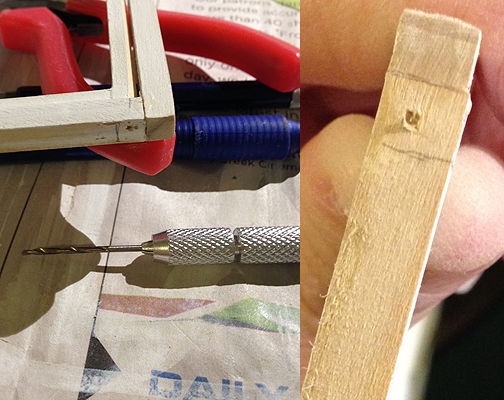
So the first thing I did was mark where the side of the window panel meets the bottom of the frame. I drew the box there so I knew where that wood board would be and then I marked with a dot about where I wanted to attempt my hinge. I decided to put the hinge a little off center and more towards the edge where I want the window to swing open. I made this decision by following this dollhouse pin hinge tutorial here: Pin Hinge Tutorial at about.com.

windowpinstartdrillcomplete

The tutorial at about.com has you using a hand drill for this next segment, but because I do not have a hand drill bit small enough for my liking I ended up using the hand drill here just to make an indentation into the wood to give a starting channel for my dremel which has a much smaller drill bit that is more suitable. Anyway the above shows you my hand drill tool and the starting channel for the dremel.

dremelbit

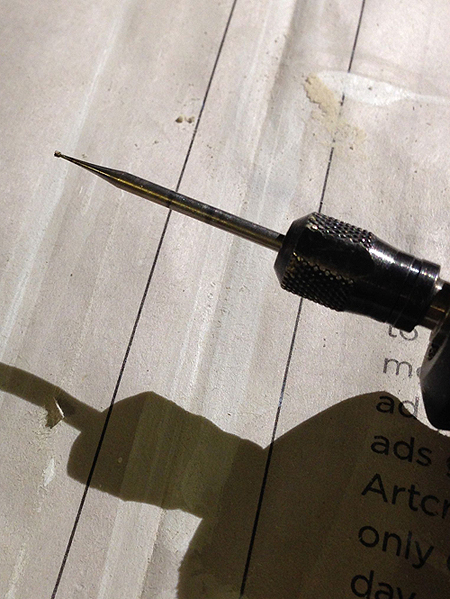
So this is the dremel drill bit that I used. It’s super tiny, but because it expands at the base, it is not possible to drill through the entire width/length of the wood pieces, but this is ok, because we will be using a dress makers pin for the hinge and you can gently force it through the wood the rest of the way.

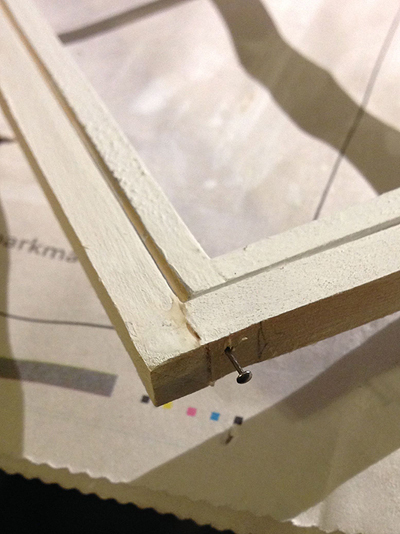
windowpin01

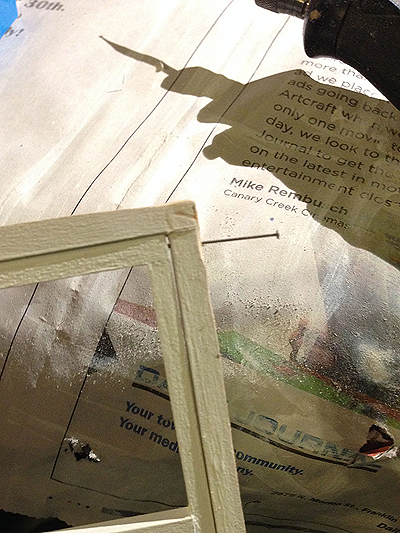
Here is after I dremeled the hole and stuck the pin straight through to the other side. The next step is to line up the window inside the frame and pierce it with the needle.

windowpin02

Here I have perfectly aligned the window to the frame as I want it, and I re-inserted the pin through the hole to pierce the wood of the window itself. What this does is it gives you a small hole exactly where you need to drill the corresponding hole in the window.

windowbevelplushole

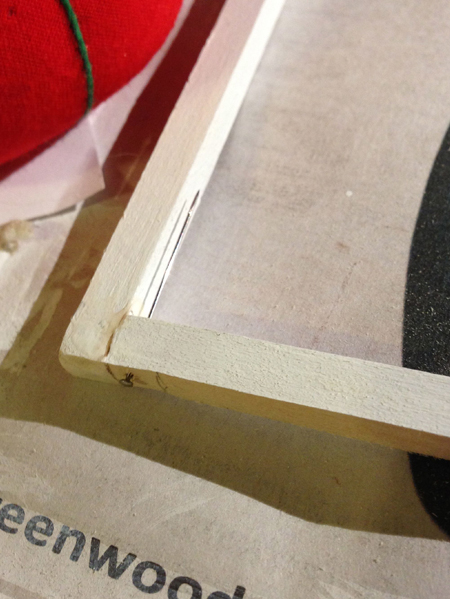
After you pierce/mark the window board, remove the pin again and dremel the hole. If need be start the channel again with the hand drill. I also want to point out that at this time, you need to bevel the side of the window that is facing the direction you want the window to open towards. I have decided I want my windows to open outward since it will be less likely to interfere with any future furniture arrangements. You can see my bevel in the picture above, but I will show another one below.

bevel

Here is a close-up of my bevel. Basically you will sand the corner off of the side the faces the direction you want the window to open…it will be about a 45 degree angle. You don’t need to do much and you can always touch up paint later. The reason why you need to do this is because your window won’t open if you don’t since it will get hung up on the squared corner of the wood. If you are having trouble grasping this section, then please refer to the tutorial I mentioned earlier as they explain it a little differently and it may make more sense to you. Oh and lastly you do not need to bevel where the two window panels meet in the middle, you only need to bevel the side which butts up against the window frame.

windowpin03

Lastly after doing your touch-up painting you will just reassemble your pin hinge. Here you can see my window snug in the frame with it’s bevel all ready to go. Now, since this is a larger scale window, you have two options to finish the pin here. You can leave the head on like I did and just gently press the pin all the way into the wood so that the head is flush with the bottom of the wood of the frame. If you do this, just take your time and be careful not to bend your pin! The other option which is discussed in the about.com tutorial is you can cut off the excess pin. If you cut off the excess pin though you will need to putty in the hole at the bottom so your pin does not fall out. Take care though not to accidentally fix your hinge in place. Personally I think it is easier to leave the head on, and considering this is for a 1/3rd scale doll roombox the tiny amount of pin head at the bottom won’t matter much in the long run when trying to fit your window into the window cut. That’s just my opinion though and you should do what is best for you and your project.

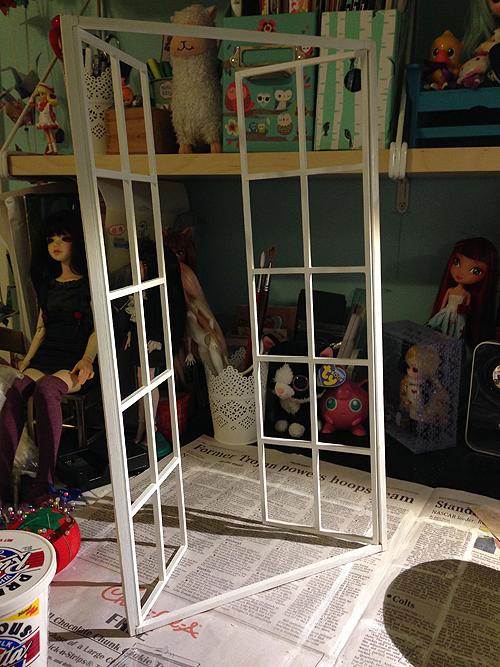
windowtest

OK, so basically you will just need to lather, rinse and repeat the above steps to create pin hinges for the top and bottom of both sides. You will have 4 pin hinges total. Above is my finished product which I tested out to make sure everything was working fine before I went to glue it into place. Once you glue your window into the window cut you are pretty much stuck with it unless you want to remove the window to make changes, which is tough. So, get everything right the first time!

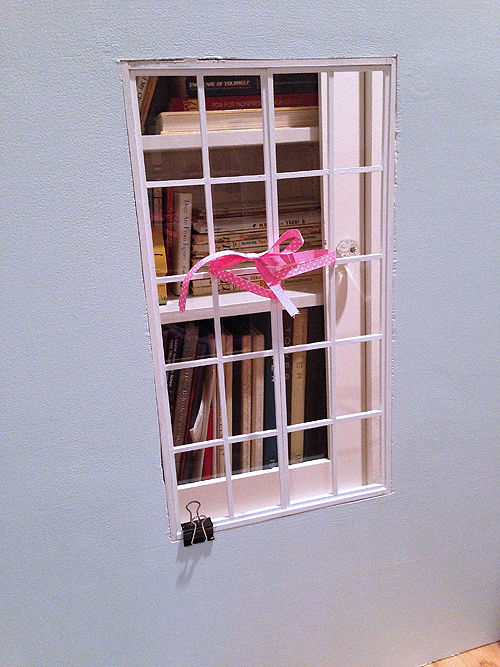
windowgluein

Ok here is the window being glued in. Be sure to have some little clamps handy if there is a section of window that is being testy and wants to come off center. I also tied my window panels together for safety since the pin hinges are delicate. Yes, please do keep in mind that the pin hinges using sewing pins is delicate at this scale. If you want something more durable for rugged play you may consider trying small finishing nails. Also, one more tip and that is to be sure during the whole process of creating the window that you are double checking the fit to the cut in the room box. It is very easy for things to become a little off, especially when gluing in all those sashes, so keep checking up on the fit so you don’t have any unhappy surprises at the end where the window doesn’t want to fit into the window cut without extensive sanding. If you keep checking the fit you can make minor adjustments here and there and save yourself a lot of tears and frustration.

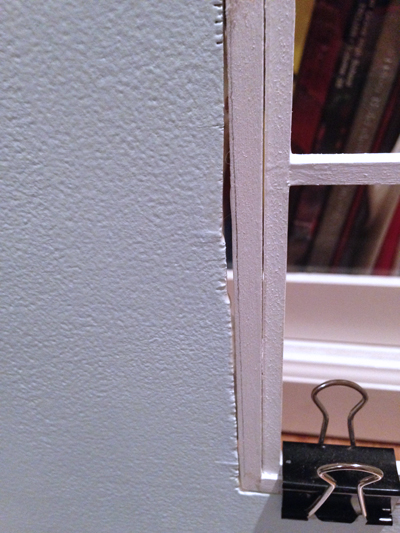
gaps

I also wanted to point out here that making window cuts with the saber saw are never perfect. Here you can see one of the larger gaps between my wall and window frame. You can fill a little bit with glue at this point if you are concerned about stability or you have too many big gaps like this. Keep in mind though that you will be cover the window frame and part of the wall with your window trim anyway and the additional layer of wood on glue will also add stability and perhaps more importantly HIDE YOUR ERRORS!! hahahaha!

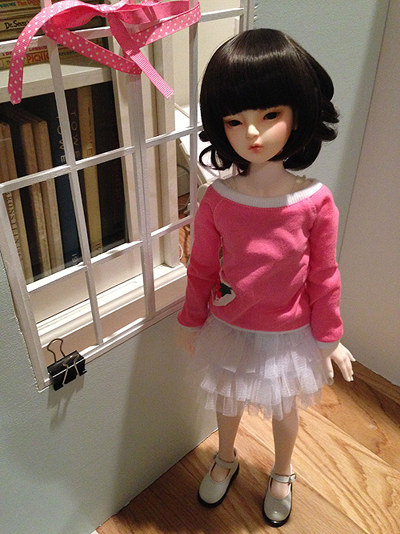
windowscale

I have yet to trim my windows as I ended up getting started on the wood flooring right after this, but I will leave you with this picture that shoes the scale between the window and my Zaoll hybrid. It’s not a very good photo of the doll, but I guess that’s not important. So another thing to keep in mind, Zaoll is only 53cm tall. The current design is probably best for 60cm dolls give or take a centimeter. The 65cm boys will still be able to look out the window, but they will seem a bit overly tall. This is fine for my purposes though because the room is for my girl, and the scale will play up her shortness a little. I’ll be sure to pose the final touches with the trim later and perhaps later on tonight I might blog a bit more about laying down this flooring while the glue is drying yet again.

SD/SD17 Size Room Box Progress.

I had a chance to get more work done on the SD/SD17 scale roombox, and I’m really pleased with how things are going so far. Come tomorrow though it’s back to work so I’ll have to focus on that and if I get my work done early then I might have a chance to get a little more done. :3 Anyway the two main things I worked on since the base was created is I started painting the walls and I created the window.

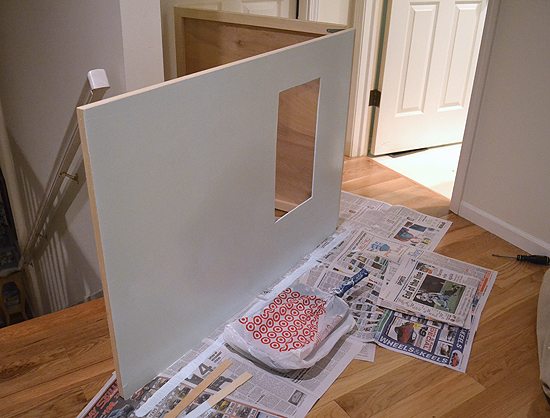
bluepaint01

I decided to pain the back wall of the room box a pale blue color. It was actually some paint we had leftover from repainting the bathroom. I really like the color and since I plan to do a pastel shabby shic, beachy sort of room I thought it would work well.

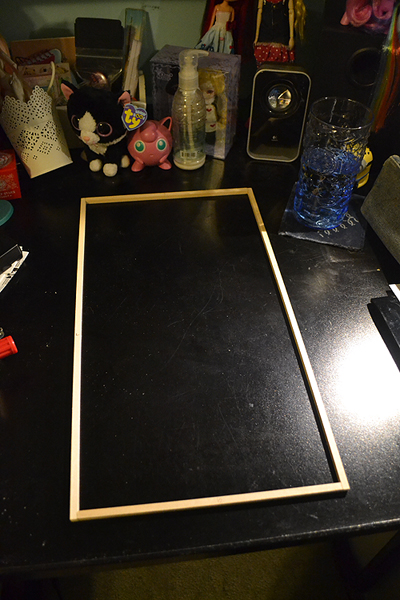
frame01

While I waited for the paint to dry to add more coats of paint to the back wall I started constructing the window. Above is just the frame of the window. Previously I had always framed out the window directly onto the window cut in my other dollhouses. This time however I decided that I will create the window entirely and then just seat it into the window cut when I am finished. The main reason I am doing this is so I can use pin hinges for the window. If you don’t know what pin hinges are, they are basically hidden pins that hold together the window to the frame and allows them to pivot. For more information, just google dollhouse pin hinges and some great tutorials should come up.

windowpanels02

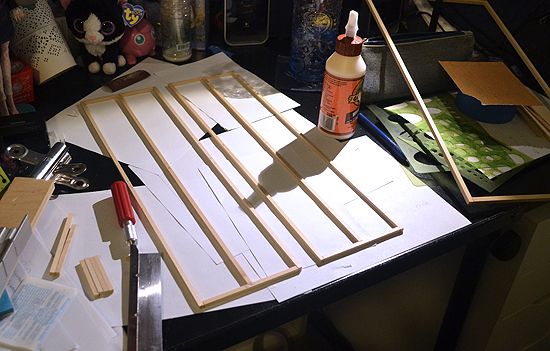
Here I have two window panels made and I’m preparing to glue in all the sash crossbars. Both of these panels fit inside the frame which is off to the side.

sashes01

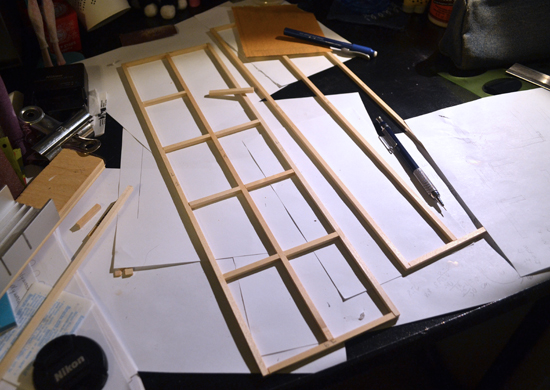
Here’s a bunch of the sashing being done.

sashes02

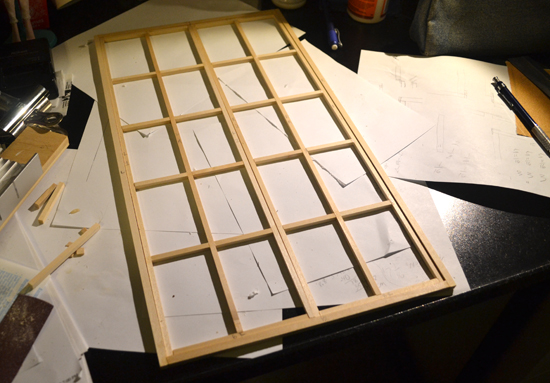
And here it is completed! At this point I start sanding any trouble spots, and I also want to make sure that the window panels will be able to fit nicely together and also be able to open freely. Normally something gets a little off when creating a window so I have to do some sanding on the sides so the window panels don’t fit so tightly into the frame. After sanding everything I started on painting the window frame and panels white. I don’t have any pictures yet because the one shot I took turned out a bit too dark. XP Anyhow I will say though that when painting the window and frame I use acrylic paint that I thin down a little bit. You want it to be thick enough to coat, but also thin enough not to be clumpy or build up horribly. That small fraction of a millimeter of paint on the window could make the window fit too tight again, so it’s best to start with thinned paint and build up slow even coats of paint.

I should also mention that I started painting the side wall white, and I think I’m going to play around a little bit with beams and paneling on that wall. Well, that’s pretty much it for now. I plan to work on it a little more tonight before bed and then if I can get my work done early tomorrow maybe I can squeeze in a little more room box time. 😉

SD/SD17 Size Roombox Project

Well I guess I decided to go crazy and I’ve started building a gigantic room box to use as a backdrop in my doll photography. This particular room box was designed with my Mio/Zaoll hybrid in mind who is 52cm, as well as my future plans for a 65cm boy, as well as leaving the window open for it to work well with the 60cm dolls. Beyond that I also have the hope that my MSD sized dolls could also make use of the space as well despite it being more to the scale of the 52cm to 65cm dolls. Another key point in making this piece is that it absolutely has to be collapsible because I just do not have the space for the sheer size of this thing! Anyway enough introductory blabber and on with the production. 🙂

planning

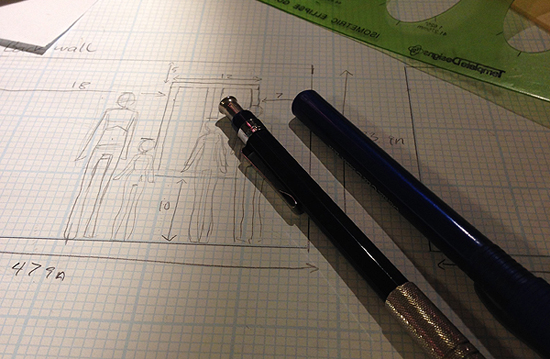
So as with all large projects, it’s best to start out with a plan on some graph paper. I spent a couple days researching other room boxes and then took extensive measurements of my current dolls as well as the few key props they have like chairs. Because this house must also work for 60-65cm dolls as well I also sketched their sizes into my plan mock-up so I could have a better idea of how big my window needed to be. I knew I wanted the window to be large and I also wanted all of the dolls to be able to look out it and to be able to open it (it will be a casement window on pin hinges that I will have swing out and/or in). In the end my window ended up being 10 inches wide by 18 inches long….it’s a long window, but it enables all the heights of dolls to look out it.

Speaking of measurements, here is what I arrived at for my final dimensions…The room box is 47 inches wide, 31 inches deep and 33 inches tall. To keep this in perspective, it’s about 75cm in height so even a 70 cm doll could stand and be photographed in it, though I feel those dolls are probably a bit too big for me to handle. ^^;

Now on to the materials I chose. For the walls I decided to go with 1/4inch birch plywood, because the walls will be hinged, I knew that the weight and size of the 1/2 birch plywood would be too unwieldy for me to comfortable handle. The only problem with using 1/4 birch plywood for the walls though is that at the size needed for the 60cm range dolls, they wouldn’t be very stable. My dad gave me the idea though that to rectify it we could make a “frame” on the back of the boards out of 1 inch thick 2 inch wide boards the length of the walls. For those boards I just used some packaged Aspen because I didn’t want to deal with the less expensive but lesser quality boards which could have warping or cause other problems. For the base I chose 1/2 inch pine plywood. The base needs to be solid to hold the walls and they will also suffer the most as it is the floor afterall. Lastly I needed hinges and they needed to be long with how we were going to butt the walls together in the corner, so we went with strap hinges.

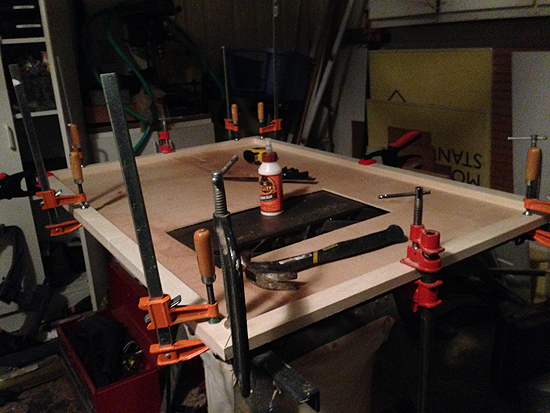
gluingframes

Ok, so after planning and buying all of the necessary wood, we started on building it the next day. I’m going to say that if you have help, getting the bare base of your room box done is totally do-able in a day. The above picture was taken after we had cut down all the of the boards to their proper size and had cut out the window. I will mention that to cut a window you will need a saber saw and a drill. You drill a hole somewhere in the middle of your window (the part that will be cut out and scrapped). The hole needs to be big enough that you can fit the saber saw blade into it. Once you do that start up the saber saw and start sawing at a smooth curve towards your cut line so that when you meet with your cut line you will be parallel to it, then just follow your line as straight as humanly possible. If you fudge up a little bit, it won’t matter, and don’t expect the window cut to be perfect…you will frame it out later anyway so if there are a couple little wobble gaps, those will get filled in with putty and eventually covered with the window trim. That’s getting a bit ahead of ourselves at the moment though, so I’ll talk more about that later.

So, after everything is cut and ready to go, it’s time to apply the frames, we mitered the edges of the frame, but you don’t need to get as fancy if you don’t have the appropriate saw for the job. Just butting the wood together in L-shapes will suffice. After cutting all of our frames to the proper length we started by gluing the frames to the back side of the wall. Because the walls had a slight warp in them we clamped down all of the frames to the wallboard and let the glue dry for around an hour. Afterwards we put a nail through where the two frames met for added support and then used a special long and narrow staple to really secure the walls to the frame boards. It was keep at the minimum though because each staple creates a hole in the wall that will then need to be puttied and sanded to finish…less holes equals less work! However we were sure to do as many as we felt we needed too.

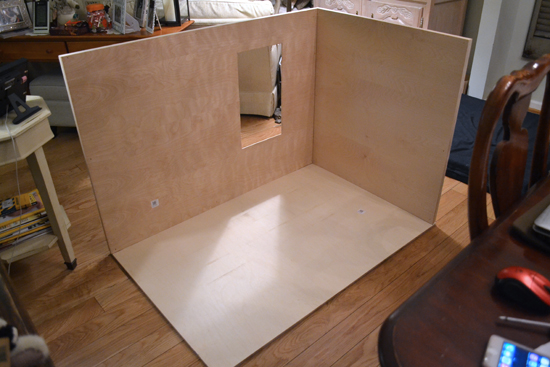
roombox-blank01

Ok, so after putting the frames on both walls, we then applies the hinges and set it on the base. You can kind of tell from the house interior that this thing is HUGE! XD Haha, maybe it’s overkill, but I’d rather have it be bigger than is needed than too small. Anyway I’ll go more into detail about the exact construction here with a few more photos.

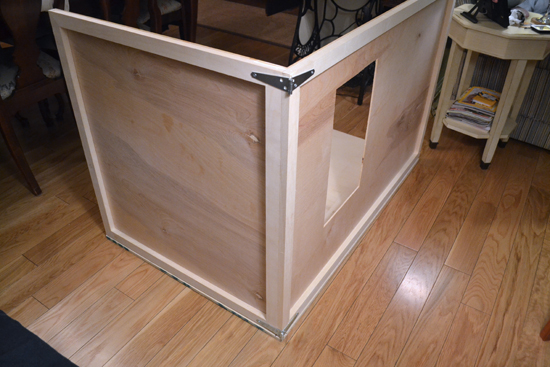
wallback

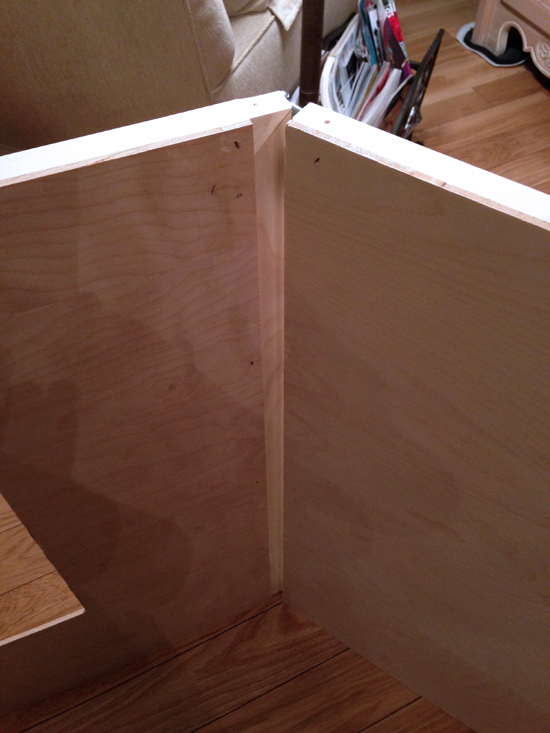
So here is a shot of the back of the box and you can see how the hinges are situated. The side wall “nests” against the back wall but the back wall’s frame edge comes out and meets flush with the edge of the side wall frame. It’s probably easier to see it so I got a close-up shot of the hinge.

hinge

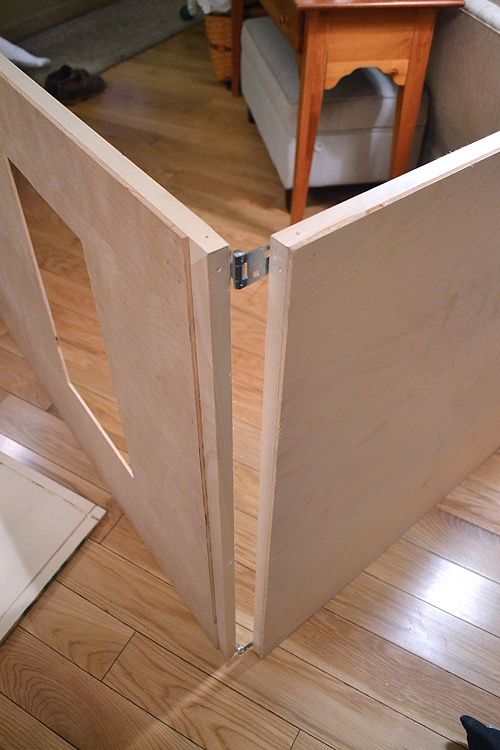
Here I think you can see the construction a little better. Basically you need to have your boards in position so that each hinge flap is PARALLEL to the board it is on so that it will come around and fold flat. This is how we arranged the wood so it does that. There is only one problem here however, but it will get fixed tomorrow and that is that the way the screw holes are positioned on the hinge, only one screw (the far one) is on the side wall’s frame. Tomorrow we plan to drill a hole through the metal in order to attach one more screw close to the edge for the frame board to prevent jiggling.

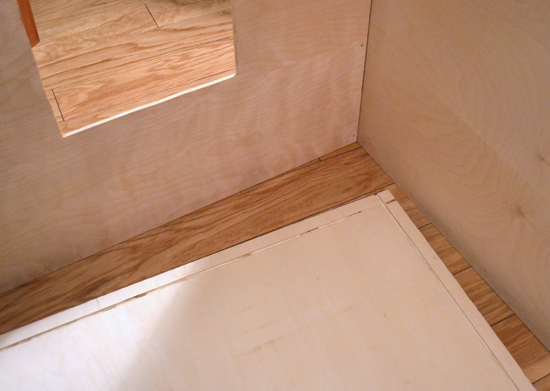
channel

Now I want to show you the base real quick. We decided to try out sawing small channels for the walls to drop into for added stability. I feel the verdict is still out on whether or not it was a good idea, lol. Because the base also has some slight warping it’s a bit tricksy to get the walls to fall into the slot proper, but when it does it looks fine. If you were planning to make a room box of your own you could consider this an option, but I also tested setting my walls directly on my base (without slipping into the channels) and it also seemed fine. Lastly it pays to keep in mind that you can add baseboards to your walls to cover up any gaps you may have and make things look nice and tight.

foldingthehinges

I thought I would go ahead and show you how this thing closes over on itself. I think it also helps to illustrate how it was constructed. You may also notice in this picture the small holes left by the nail gun from the staples. As I said before, those will be filled in with wood putty and made to be invisible. 🙂

folding02

And further we go….Here you can see how the two hinge holes on the side wall don’t really get any purchase, on the side wall’s frame board. This gets fixed tomorrow though as we will make a new hole and add a screw.

folded

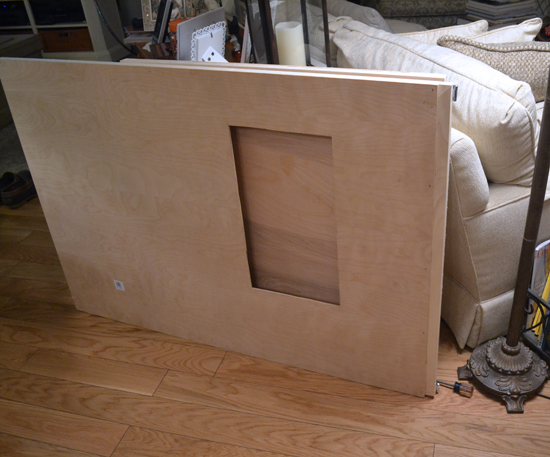
Lastly you can see here how it folds up. The side wall will end up protecting the window nicely from one side. If I do store this between the bedframe and the wall I will more than likely secure the window and then have the window side face the wall. If under the bed storage, I’d probably lay the window side down on the base.

So there you have it, this is the basic construction of the room box. Now comes the painting, flooring, window making and etc… to truly finish the piece. I’m hoping to have a little more time to work on it this weekend, but come Monday it’s back to work for me. XP Anyway I’ll be sure to share more things as I get them done…thanks for reading! I hope if you decide to build your own room box you have success!

Finally, Mio is here.

It was a long wait, but finally I got my Mio head. I was so excited to finally have her that I set about doing a face-up as soon as I could. I ended up staying up waaaay too late in the end, but I just had to finish her and get her put together. I am super pleased with my Mio/Zaoll hybrid. I love the Zaoll body and I was able to fit the Mio head right on the body without any trouble. Zaoll’s skintone is a little more pinky than the current Dollmore resin, but really it’s not by much. The first thing I did was do an all over pinky blushing to match her head with the body, and then I just started on the face-up. Really this hybrid was super easy to do and required no modding. Anyway here are a couple shots I got today

mioclean

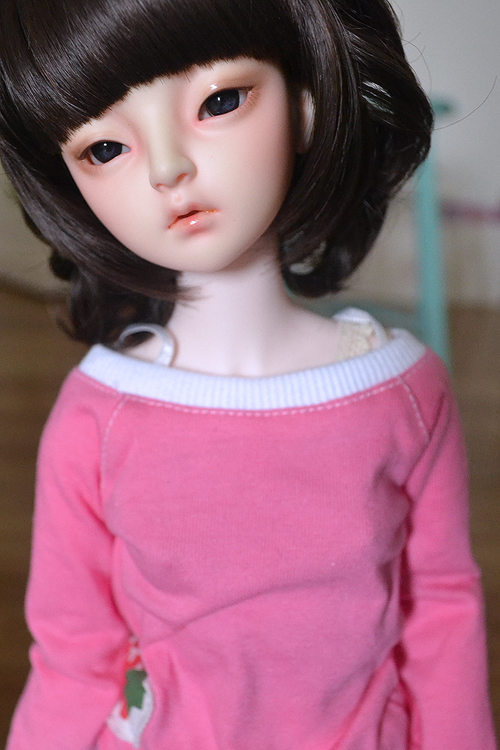
I wanted to give her a really natural almost no-makeup face-up. I’m still really happy with how she turned out, but I’m thinking that perhaps I like her better with her brows showing rather than covered up. It’s easy enough to slide the wig back a bit. Unfortunately I don’t have any photos with her brows showing, but I’m sure I will in the future because I think she’s super adorable! I may have to tweak the face-up a bit though in the future because somehow one of the corners of her mouth that I penciled in, the pencil wiped off a bit after I applied the gloss. I don’t even know how that would happen since I sealed before I glossed. I also really like the For My Doll wig I bought for her, I think it’s a very good quality wig and I didn’t feel there were too many stray hairs I had to trim. It’s also a nice smooth fine fiber and really just excellent quality overall. Despite liking the wig though I think I still want to experiment with other wigs lol…I have an old red k-starr wig I’m going to try on her and I may order a mohair wig to see what that would look like.

Unfortunately the 16mm eyes I bought for her just look too big to me in her head. I ended up stealing Zaoll luv’s 14mm acrylic eyes to borrow for now. However when I removed those eyes I realized that somehow they had become cracked and broken. I am hiding the cracks the best I can, but the acrylic is pulling away from the printed iris which causes her to have a milky eyed look depending on the angle. I have never had a pair of acrylic eyes crack and break so badly. I have no idea what caused it since Luv was sitting in her box for the past month. In any case I probably won’t be trusting Dollmore’s acryclic eyes from now on. Their glass eyes are great, but I don’t want to run the risk of more broken acrylic eyes, even if they are cheap.

group

And here’s a quickie group shot of Mio on her Zaoll body with my two MSD girls. I like how Sona’s proportions lend her to looking like she could be a little sister. Luli’s proportions though don’t suit her for that, so I guess she a “friend” doll, lol….

Well, that’s it for now. I actually have other dolly news and dolly finds to share, but sadly I just haven’t been able to find the time to blog much this fall…been super busy! D: It’s ok though, I’m kinda happy to be busy, especially where it involves incoming dolls. 😉

Eye types for BJDs

I had gotten into an interesting discussion on DoA about the different types of eyes available and peoples preferences and such which I thought might make for a good blog topic. A lot of this information might be common knowledge to someone who has been deep into the hobby for years, but I think it might be helpful for people just starting out or even for people who have had dolls for a while but never investigated the different types of eyes available.

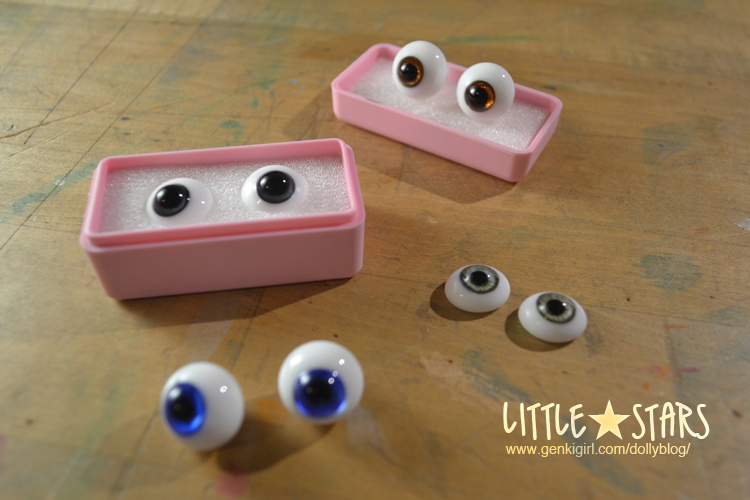
So the first type of doll eye we have are glass eyes. There are a few of mine in the picture below. I have others but I wasn’t about to go removing eyes from my dolls or anything, lol. Glass eyes are naturally, made of glass, and by many doll owners are considered to be the best type of eye. Glass really reflects light the best and can really make an eye light up, but often they will be less realistic than acrylics, silicon and sometimes even resin. It also pays to keep in mind not all glass eyes are created equal. Cheap glass eyes are just that, cheap and often they cannot even rival a good quality acrylic eye.
glasseyes01

The blurry set of eyes in the foreground of the pic above are Mint on Card eyes, which were a free gift. The flatback eyes are Miniworld, and the black and brown pair sitting on parts of the pink box are both Dollmore. The black eyes, which if you look closely are actually a very dark charcoal gray are really very good quality. Rather than being straight black, the deep charcoal will give a slight hint of depth in the eye. They are a bit tricky to photograph though as often they will appear just black. The other pair are special Dollmore eyes and are extremely pretty, they have great clarity and the brown glitter in the glass really makes the eyes sparkle. Both of the Dollmore eyes I consider good quality.

glasseyeskemper01

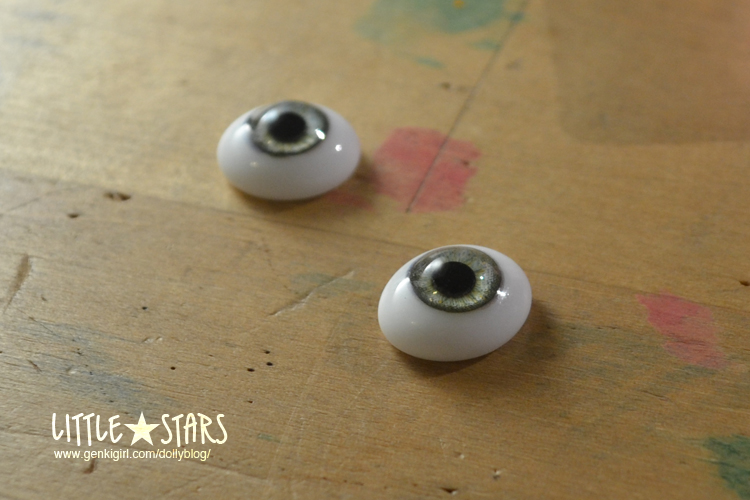
Now on to the lesser quality eyes. Above is a cheap pair of glass eyes from Miniworld. Inside them there is a dotty print in a low lpi of an iris. Of course it has all the transparency and glossiness of glass eyes, but because the iris is some sort of print, it does not really refract the light.

glasseyes02

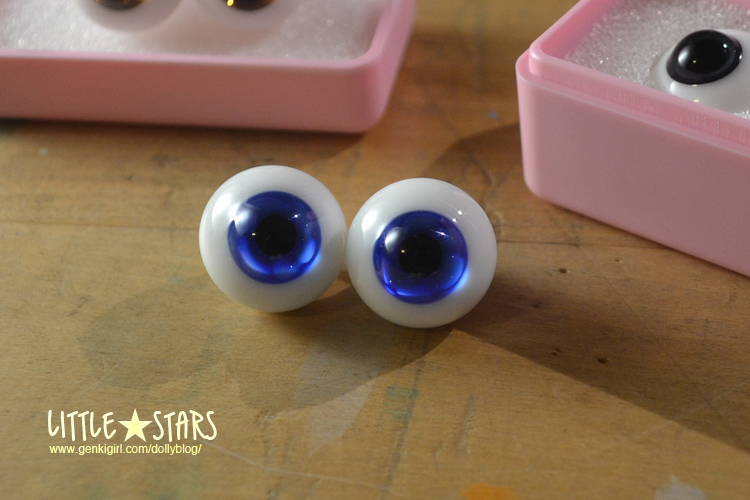
This next set of eyes are from Mint on Card, they are just their basic glass eyes that they sell. These were a freebie so I shouldn’t be too hard on them, but on the other hand, buyers should be informed. These eyes are not as bad as the Miniworld ones, they are all glass and they light up quite nice under the right conditions, BUT they are certainly a very goofy color of blue and the threading which you can just barely see in this shot is irregular. They also seem to like to cast their blue color into the whites of the eye at places as well. If you compare these eyes with the Dollmore eyes, there is no comparison, Dollmore wins.

siliconeyes01

Next up are silicon eyes, this pair in specific is eyeco A113 I belive. The benefits of silicon eyes are they they are rubbery and therefore can bend and be pushed quite flush in the eye wells of a doll. Their irises are basically a print encased in clear silicon. Because they are a print they can be as detailed and as real looking as a human iris. However because they are a print, they can’t refract light, all sense of light from a printed silicon eye comes from the high contrast of light against dark in the print itself. Another drawback of silicon eyes are that because they are rubbery they can collect dust easily and may need to be wiped with a damp cloth periodically. Overall I do like silicon eyes, you can get some really nice variations of irises and if you have a doll with an odd or irregular eye well it’s easy to squish the eyes in there so you no longer have any hollow spaces around the eyes. I haven’t tried any other silicon eyes besides eyeco though, however people do seem to praise Soom eyes as well.
acryliceyes01

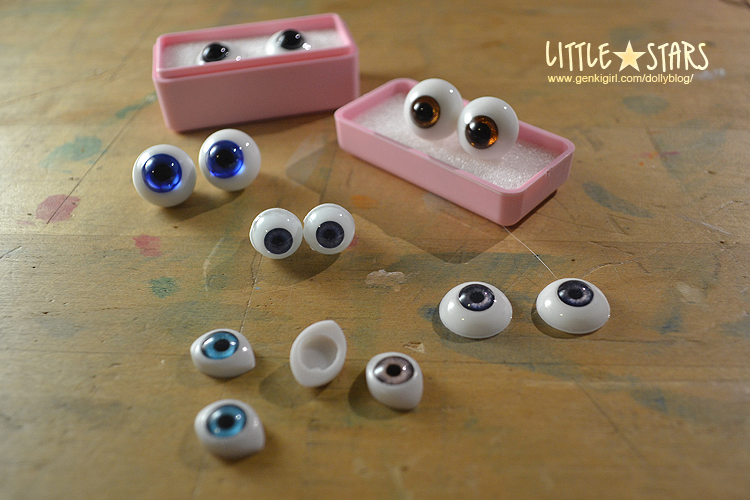
So now draw your attention to the pair of eyes in the middle of the shot above. Those are acrylic eyes and this particular pair happens to be my default unoa eyes in a dark blue. This isn’t my best pair of acrylic eyes sadly and they are just dark and don’t offer much reflection at all. If you want to see a better pair of acrylic eyes then have a look at my Lusis here: http://www.genkigirl.com/dollyblog/?p=1168 Her current pair of acrylic eyes can light up a little bit similar to glass, but not nearly as well as glass. So, acrylic eyes usually also rely on a print of an iris that is set under plastic. Occasionally you can also find hand painted irises, but those are kind of rare. Another benefit of acrylic eyes are because it’s a print, many different types of eyes such as cat eyes or fantasy eyes with symbols embedded in them can be done.

acryliceyes02

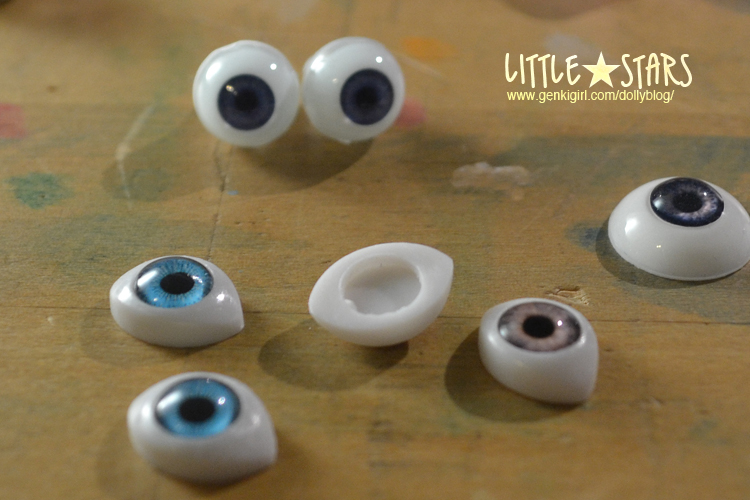
As with glass eyes, acrylic eyes can be good or bad quality. In the above pic you can see the worst quality acrylic eyes I have which came standard with my AE Yara. They are little hollow flatbacks in an odd shape that you can really play with to angle up, down or side to side because usually you wind up seeing the side of the eye and having a gap. On top of this the iris section of the eye is a completely different plastic part and there is a visible seam between the iris and white of the eye. The print of the iris isn’t anything to write home about either.

The last type of eye I will talk about are resin eyes. I do not have any resin eyes yet, but I do know that they are the best at imitating the reflective qualities of glass. Their only drawback is that like your dolls, they can yellow over time, that and they are often very expensive. Enchanted Doll sells eyes for $50 a pair, but they are definitely beautiful and something I might like to own one day.

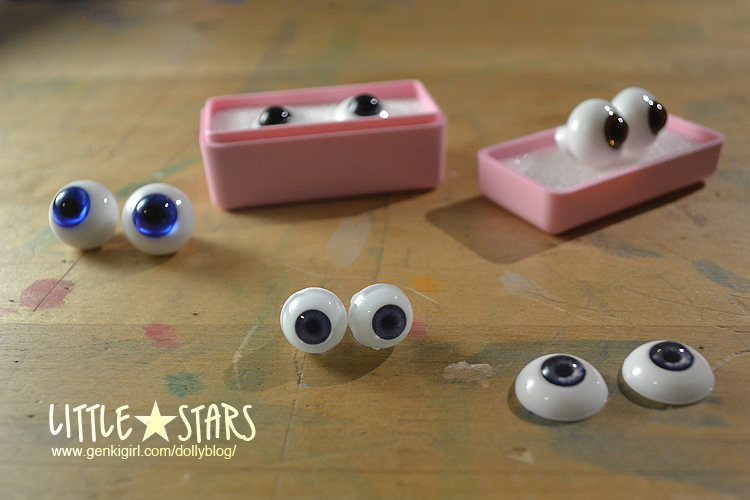
alleyes

So, in the end basically remember this….you get what you pay for…If you buy a cheap pair of eyes, that’s what you are often getting, something cheap. A really great pair of eyes can make a big difference in the way you doll looks and is photographed.

Here’s a quick list of the eyes in this post: Miniworld glass flatback, Mint on Card glass eyes, Dollmore glass eyes in Y03 (black), Dollmore Special glass eyes ET27 (brown), Asleep Eidolon acrylic, Unoa default acrylic, eyeco silicon A113. I will also be posting the “group shot” of eyes on my flickr and annotating them.