Pullip’s House – Nearing the Finish Line

dollhouseprog10

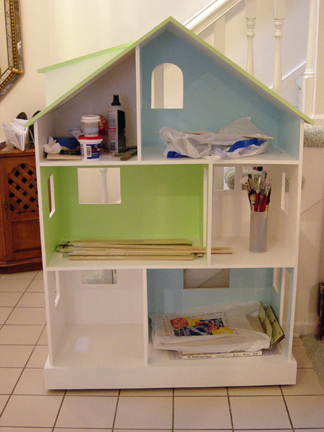
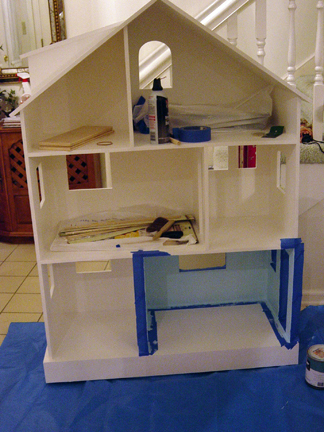
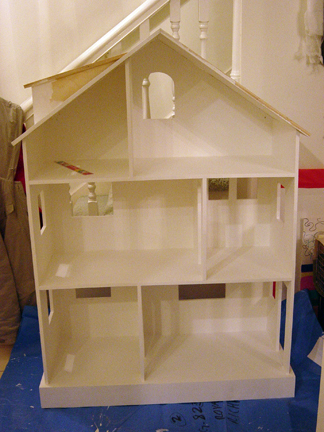
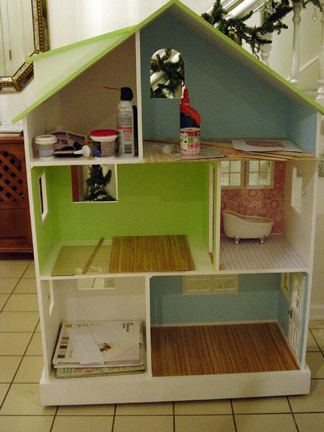
Here is another overall project shot of the house. It’s been a couple days though since these pics, so I have even more done now than the photo shows. As I think I said before, it’s all the small detail work now, trimming out the windows and the rooms.

livingroom

I shot this pic of the finished living room with the flash. I wind up working on the house off and on all day and then take progress pics at night. Unfortunately taking pics at night isn’t the best of things. Anyway the flash made the aqua paint seem lighter than it actually is.
frontdoorfin

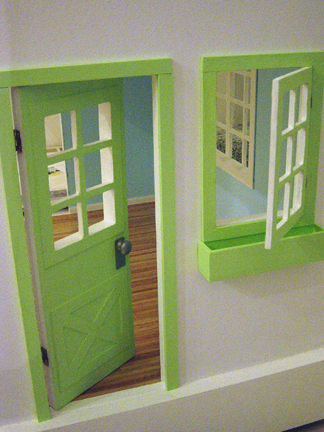
Here is the front door area. I wanted to have working doors on this house and also some windows you could open and close for photo ops, and well fun also! Some of the windows I am framing out though are not hinged. I am also not putting any type of fake glass in the windows, because I am just not that fond of it, however as you can see from my photos I have been adding the detail of wood sashes as it makes things look more charming.

I can’t remember what I’ve already discusses by way of working with hinges, so if I repeat myself forgive me…The doors are hinged using 1/2 inch hinges. These were attached with screws and are very sturdy so these doors can be played with, without any fear of them coming off. The windows on the other hand are only 1/4 inch thick wood so I’ve been having to make do with small 1:12 scale brass hinges. These are the type of hinges that you have to nail in with tiny brass nails, and not surprisingly they pull out easy. I’ll be frank, using the 1:12 scale hinges for playscale is sucky, because they are not durable enough and can’t handle the stress of the larger windows and the repeated usage. However because these hinges were all I could find to hinge my windows, I’ve been having to deal with them, and I can share a few tips with you.

My first tip for working with the 1:12 scale brass hinges is to start your nail hole with a straight pin. By starting the hole with a straight pin you create a channel to get it started and thusly it makes it easier to hammer those tiny blasted nails in. Secondly you’ll need to use a nail set to really get them in there good. My second tip, and probably unorthodox one, is that once you have your hinges in place, and you know that everything is functioning, you can very carefully put a dab of super glue over each nail to be sure to secure your hinges extra tight to the wood. You have to be careful though because if you accidentally get the glue in your hinges you will ruin it. I generally do one side at a time and prop it up so that if the glue starts to run, it will run away from the middle hinge part. I imagine there is a possibility that you could try to forgo the nails altogether and just superglue the hinges on, but I thought perhaps glue and nails might be sturdier. My final piece of advice is to inset your hinges. I inset my hinges by using a dremel to gently shave out a small patch of wood where my hinge will set. I also have a preference for H hinges as they cover a little more area, but you may have your own ideas of what you want to work with.

Well, that’s it for now. I’ll be sure to post more progress later even if it is a little late.

Dolly Find – Porcelain Claw Foot Tub!

dollyfind-clawfoottub

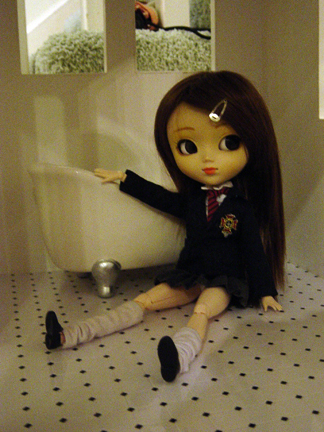
A couple days ago when I was looking at the Sunday ads I noticed a little bath gift set that was all contained in this little porcelain tub. I decided to go investigate it to see if it could work for Pullip, and as you can tell, I am pleased to tell you that yes it does! Pullip fits inside the tub as long as she has her knees up, which is good enough for me, and really the back is high enough that even her big head can rest against it as she reclines. Since Dal is shorter than Pullip I am wondering if it would work even better for her. Either way it was a nice find for $9.99, and it is porcelain, though the feet are not metal, they are just painted porcelain. I scored this item at my local CVS, so if you are in need of a dollhouse tub, you might go check it out!

Pullip’s House – Another Progress Report

dollhouseprog08

I have the roof painted, and the three rooms that will have color painted as well. The green color of the roof will also be used for all of the exterior trim when I get to that point. As far as progress you can’t see goes, I have also been fitting and painting the crown molding for two of the rooms. Crown molding is kind of a pain in the butt and also expensive so it is only going in the first and second floor painted rooms to hide painting boo-boos. I’ve also slowly been attempting to cut and fit my flooring, and have also begun trimming out my “front door” which you can see in the picture below.

frontdoor

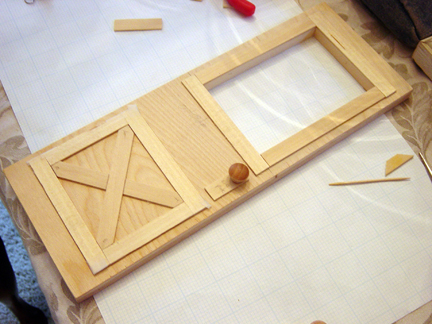
The window in the door will have a wooden sash, but I don’t plan on using any glass in any of my windows, fake or otherwise because I just don’t care for it. I’m using 1/2 inch plywood for the doors so they fit the walls perfectly and don’t have any weird insetting. For the trim, I am using the 1/16th basswood strips. I feel particularly crafty in regards to the doorknob though. All of the miniature doorknobs I’ve found have all been 1:12 scale and thusly I felt too small, so I had to come up with a way to fake a doorknob, and the result was using some mini wooden drawer pulls and basswood strips for a plate.

doorknobs

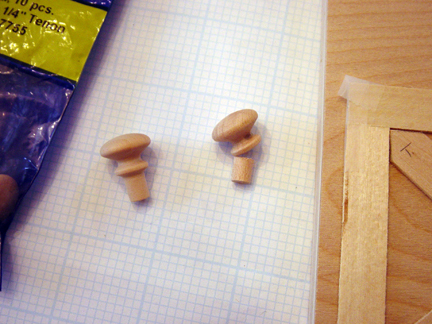
Now the drawer pulls have a little extra peg on the bottom which is problematic, but I figure out a way around it. I simply sawed off the peg using my exacto saw. It’s pretty easy when you use a pairt of jewelry pliers to hold the thing still while you saw. After sawing the pegs off I mounted them on their little plates. I plan on spray painting the doorknobs a silver color to make them look metallic in the end. I can’t wait to see what it looks like when I am done!

Pullip’s House – We’re Getting There!

dollhouseprog07

At this point now the roof has it’s white base coat and I’ve begun taping off the rooms and starting to paint the ones that will not be white. Painting progress is slow because of drying time and it makes me feel like I haven’t been making much progress at all. :p To make matters worse, paint smoosh sometimes gets under the painters tape, so afterwards I have to go back with a small brush and clean up the edges.

To be honest though, this picture is a little old, and I have actually made more progress with painting but I have yet to snap a pic yet. I shall have to do so soon! So far I am loving my color choices!

Pullip’s House – More Progress!

dollhouseprog06

I actually made this progress a few days ago, and now I am away for Thanksgiving, so I won’t be able to work on the house for a few days. Either way as you can see that the roof is on and I’ve begun painting it. At this point we also have the wheels on it which are hidden under the base. The trim around the windows on the inside of the dormer have also been done, and what you can’t see in this picture is that the doors have been cut and we are fitting them to each doorway. I can’t wait to be able to return home to work on it again!

Hobby Lobby is having a sale this week though, all miniatures are 50% off, so I went out before we left town and cleaned them out of wood flooring and baseboard trim, LOL. Anyway if you have a Hobby Lobby in your area you might go check it out. 🙂 I also forgot to mention in my last posting that emery boards are very good for sanding small spaces. I used them for sanding on those small corners and such on the dormer.