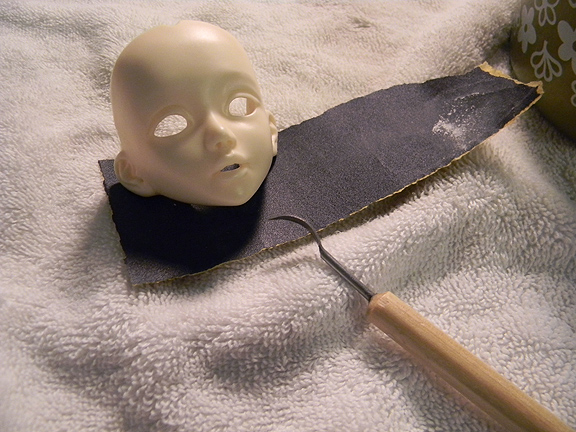
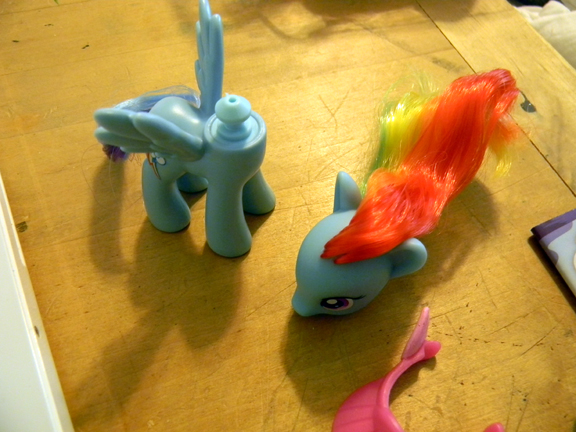
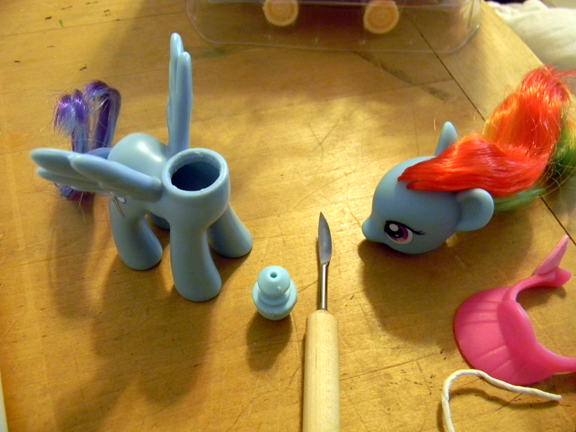
I finally cleaned off my drawing table today so I could start working on customizing my Lusis. I decided to start with her secondary faceplate, the one that has it’s mouth open a little wider. As you can see from the pic above, her open mouth is asymetrical with the right side being more open than the left. I decided I would do some carefully carving of the left corner of her mouth to give her more symmetry. To do this I decided I would use one of my clay carving tools that has a curved bladed edge that whereas it is sharp enough to carve, it isn’t as sharp as a exacto blade. You can see the tool I was working with in the picture.
Color Matches for Rainbow Dash’s Hair.
So my nylon pony hair arrived from Dolly Hair the other day and I must say I’m pretty happy with my selections. There were only a couple slight misses I think in the matching department, but it really doesn’t matter so much since I have enough hair to redo more than one Rainbow Dash. Anyway I had to use my old camera to take these pics, so they may not be the best, but hopefully they will be good enough to help you choose the proper hair color.
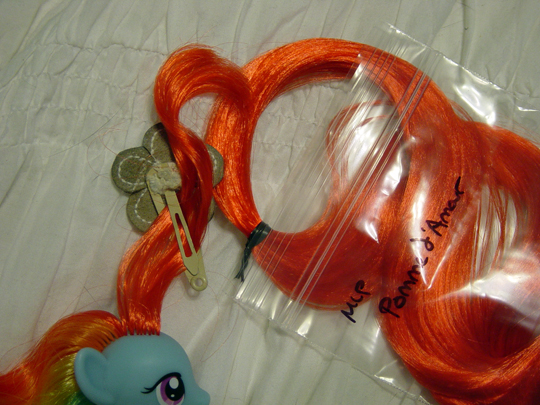
This color photographs more like a dark orange, but this color, Pomme de Amour is actually a very warm true red that matches the red on Rainbow Dash’s factory mane extraordinarily well. As you can see, even though it’s orangey in the picture, that it still matches perfectly with her mane.
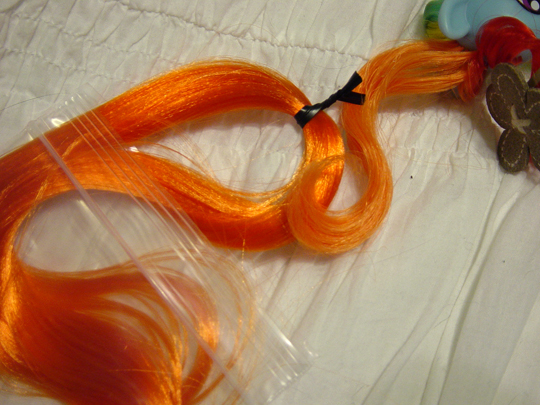
I decided to order the color called “Nectarine” for Dash’s orange color, and it’s a pretty close match. The differences are that Dash’s factory mane is just slightly lighter and a little less vivid than nectarine. I’m not sure I have any suggestions for which other colors to try, but there is a new shade called Marmalade at Dolly Hair that I wonder if it might be a better match. If anyone has this hair and has compared it, feel free to leave a comment and share any info you may have!
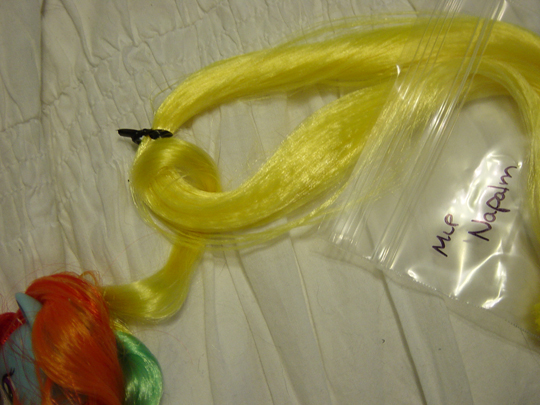
So the color I ordered for the yellow was called “Napalm”, and I feel it is a very close match. If you mix her default factory hair with napalm you really won’t be able to tell the difference between the fibers. If there is any difference between these two colors it would be that napalm is a teeny tiny bit lighter and more brilliant, but I really have to scrutinize to see it.
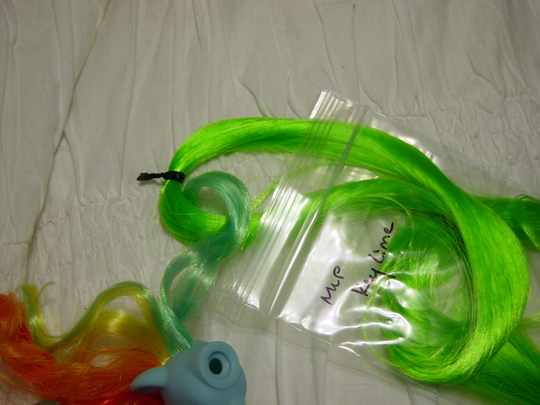
Ironically this color, “Key Lime Green” was the most agreed upon green color to match Dash’s factory mane at this forum I visited to gather research. As you can see from the image, so far it is the worst matching color of the bunch….booo! Key lime green is much more vivid and green that leans into the yellow side of the spectrum, more than Dash’s factory default mane which you can see leans more into the blue spectrum of the greens. Unfortunately I don’t really have an idea of what would be a better match because “Unlucky Clover” and “Lucky Clover” look a little too sea green, “Sour Apple Martini” is described as being more fluorescent and vivid than Key Lime, so that’s obviously the wrong direction. Anyway again, if anyone has any experiences with matching Dash’s green hair, please feel free to add your input in the comments!
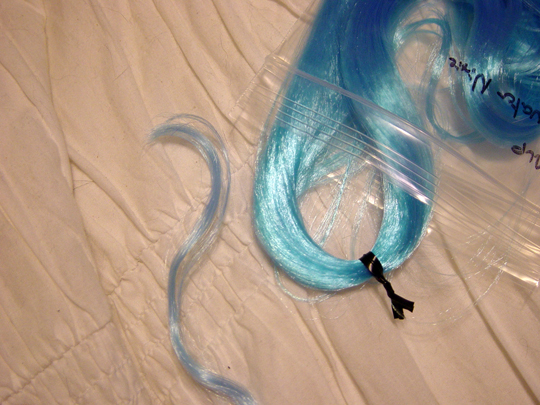
To be honest I really wanted to order the shade “Bluberry Muffin” to try for a Rainbow Dash match, but since it was sold out I decided to go with “Water Nixie” which was yet another suggestion I had seen on a pony forum. As you can see in the picture, Dash’s blue hair is a little less vibrant and slightly lighter than Water Nixie. I still think Water Nixie is a lovely color if you are replacing Dash’s blue altogether, but if you are really trying to match her factory color I am still going to suggest giving Blueberry Muffin a try since it is described as being a lighter version of Water Nixie on the Dolly Hair site and so I think it might just be the perfect match. 😉
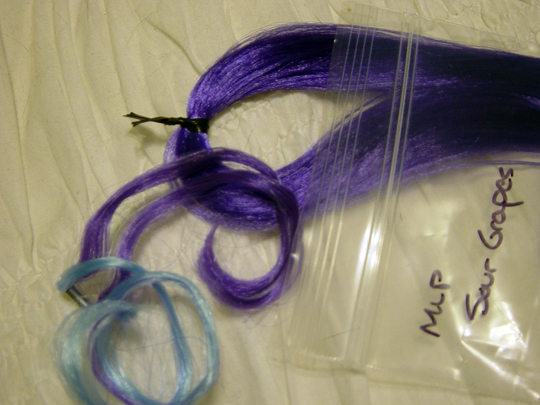
So the final color I ordered was “Sour Grapes” which was another color I had seen suggested on various forums. Sour grapes is a pretty close match to the factory original violet. The only problem with it is that sour grapes is is a little more vibrant and shiny….to be honest Dash’s default violet hair looks kinda dull next to sour grapes, so I would suggest going ahead and just replacing her old violet. However if you don’t want to do that, I think sour grapes is a passable match.
Well that’s it for now. I’ll post more of my adventures in customizing my Rainbow Dash in the future as I make more progress on her. 🙂
My Little Pony G4 head removal and etc..
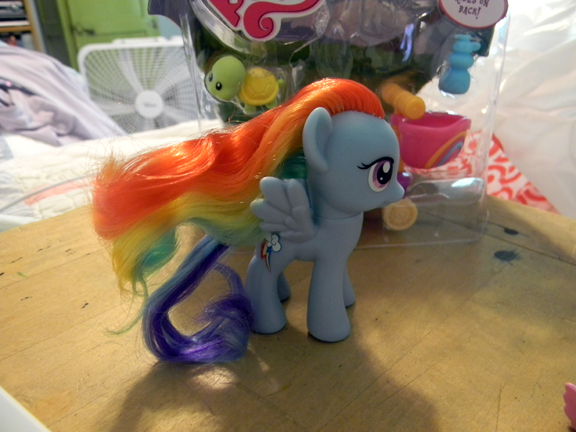
Well I’ve been bitten by the Pony bug now too after watching the Friendship is Magic series that has the absolute best stylization of the ponies to date in my opinion. My favorite pony is Rainbow Dash but unfortunately her toy looks hardly anything like her as you can see in the pic above. Many of the characters from the series suffer from poor toy design but I consider Rainbow Dash being on of the worst. XP
It should be clearly evident from the pic, which is Dash straight out of the carton, that her mane is styled nothing like her character, AND on top of that her mane nor her tail contain a full rainbow, but instead Hasbro cheated and made her tail teal and violet, while her mane is red thru green. Other problems with the Rainbow Dash figure are that her eyes look a little more like Fluttershy’s and she only has a cutie mark on her right flank, while her left remains blank. :/
So with all of that said, I’ve decided to embark on a customizing project to try to make Rainbow Dash actually look something like Rainbow Dash. The first thing you have to do then is remove the head.
For anyone whose ever removed a head from a doll or toy before, this is super easy. It’s just a simple peg through the hole and you should be able to just pull it right off in a couple of seconds, no biggie. Getting the head-plug out of the neck hole on the other hand is another matter. If you examine your headless pony, you will see that the head plug is a hard plastic, surrounded by the soft pliable plastic of the pony body. The goal here is to separate the two at the seam where they are glued together.
So, I have read some tutorials where people just cut the plug out around the seam using an exacto knife, and I think that will work fine, but for me, I prefer to use objects that are a little less sharp if at all possible since I am accident prone. If you are also accident prone or you do not have an exacto knife then my method should work for you! The first thing I do is I take my blowdryer and on the hottest setting I direct the hot air at the neck. The reason to do this is that it softens up the plastic and makes it easier to insert a knife or other object between the body plastic and the plug plastic. The tool I used, as you can see from the picture, was a small clay carving tool. This tool has a slightly curved bladed tip that you really can’t hurt yourself with. Anyway while your pony’s neck is all nice and warm, you want to find a good spot to carefully force your tool between the body and the plug, then, as if you are cutting out a circle, follow the plug all the way around until you make a complete circuit. If you went deep enough you should be able to wiggle the plug out of the neck now. If it’s still good and stuck, then apply the blow dryer heat and try again. I say it’s always best to be cautious and take your time rather than hurry and make an irreparable mistake.
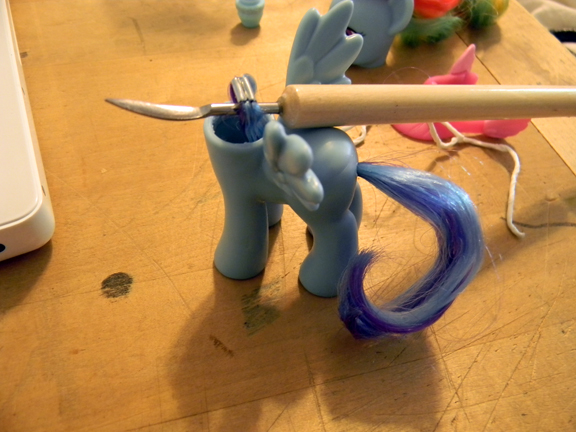
And now here is Dash getting her tail removed. Once you get the plug out, you’ll easily be able to find the tail inside. All you have to do is take pliers or a curved tool to grab ahold of the tail loop and pull it out. The above pic is Dash with her tail half removed. I just fished the tail out with the carving tool I used to remove the head plug with.
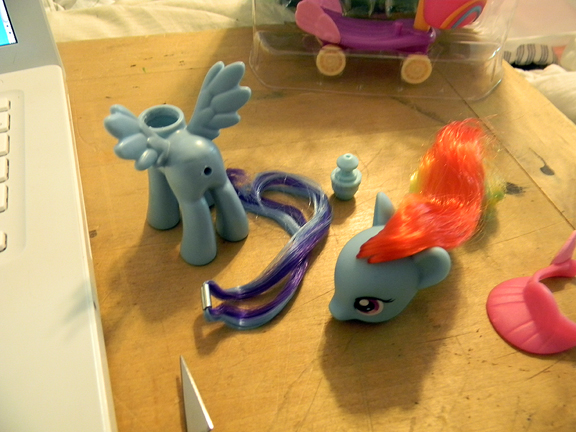
And here’s Dash now, mostly taken apart. I haven’t cut her mane yet as I need to order some pony hair to work with, and I don’t want to deal with keeping track of a loose pony mane until I’m ready to sit down and re-root her. I will probably post a continuation of this tutorial later when I re-root if it will be helpful to anyone. Well, have fun customizing everypony! XD
Preventing clothing dyes from staining your doll.
After my incident where I had to scrub my new resin baby’s butt since the cotton fabric from the new clothes he was wearing left black marks on him, I decided it was high time I did something about the clothing to prevent it from happening again.
Now everyone will tell you to wash your clothes before putting them on your doll to get excess dyes out of the clothing, and this is a good practice because a lot of the time it’s the excess dye that is the problem and not the fabric. However, everyone and their mother’s sister’s niece on DoA will also tell you to then soak your doll’s clothing in a solution of vinegar and water for a couple hours to set the colors, which is very nearly false as I recently found out. Of course it can’t hurt to do this as long as you wash and rinse thoroughly afterwards, but it will not set any dyes on cotton. It will however help to set some acid based dyes on fabrics that have been acid dyed such as silk, nylon and wool, but definitely not cotton.
So, you might be wondering now how in the world you can set the dyes on your dolls cotton clothing which probably take up the majority of your doll’s wardrobe unless you have a bunch of barbie/fashion doll synthetic clothing. The answer is a product called “Retayne” which is a dye fixative that quilters use to prevent one fabric from staining another if they need to wash the quilt. Thankfully Retayne is cheap, you can get a bottle of it for around $2 in stores like JoAnn’s where they also have lots of quilting supplies. You can also order it online from JoAnn’s and various other crafting quilting sites, BUT Amazon lists this stuff for $6, so don’t be fooled into wasting money!
Lastly I want to say that I found out all of this info from this very informative site I found called “All About Hand Dyeing”. You can read the very same FAQ section that I read here:
http://www.pburch.net/dyeing/FAQ/settingdye.shtml
The site also has lots of other useful information on special washes to help remove excess dye, as well as more information on Retayne and it’s uses. Also if you ever have the need to dye something, this looks to be a good resource for that too!
A sorta 1:12 scale mattress for a BJD tutorial
I call this a “sorta” mattress tutorial because I have left out some steps picture wise and also this may not necessarily be the best way to make a bed mattress, but it’s how I worked through some construction issues after making my 1:6 scale doll bed and mattress. I thought I would share my experiments just in case they might be helpful to others, as knowledge can always be built upon to create even greater things! If you happen to have some better ideas on mattress construction feel free to comment and share them! Anyway now on with the sorta tutorial!

